goSCOUT3D enables flexible three-dimensional measurement of complex objects
Mobile scanner makes 3D measurement easier to handle
Virtual 3D models of real objects, so called »digital twins«, offer numerous advantages – be it for digitization or in the quality control of industrial manufacturing. But the more complex an object, the more difficult it is to measure its shape and transfer it to a 3D model. Researchers at the Fraunhofer Institute for Applied Optics and Precision Engineering IOF, in collaboration with MTU Maintenance, have now developed a portable sensor that enables particularly flexible 3D capture, for example of aircraft engines. The handheld scanner, called goSCOUT3D, will be presented to the public for the first time at the OPIE’23 trade fairs in Yokohama from April 19 to 21 and at the CONTROL in Stuttgart from May 9 to 12.
Whether it’s a virtual tour of a museum or the digital capture of components and plants in industry, detailed 3D models help translate objects and items from the real world into the digital space. They enable a high level of detail, allowing even the smallest screws on technical equipment to be identified. MTU Maintenance in Hannover, Germany, the world’s largest leading provider of maintenance services for aircraft engines, also had this advantage in mind. For documenting the incoming and outgoing condition of engines, MTU’s experts wanted an uncomplicated and user-friendly solution for complete three-dimensional digitalization. Until now, the company has been using classic compact cameras, which could only be used to take photos of typical (defect) locations and only incompletely recorded the engines.
Fully automated and mobile measurement of three-dimensional objects
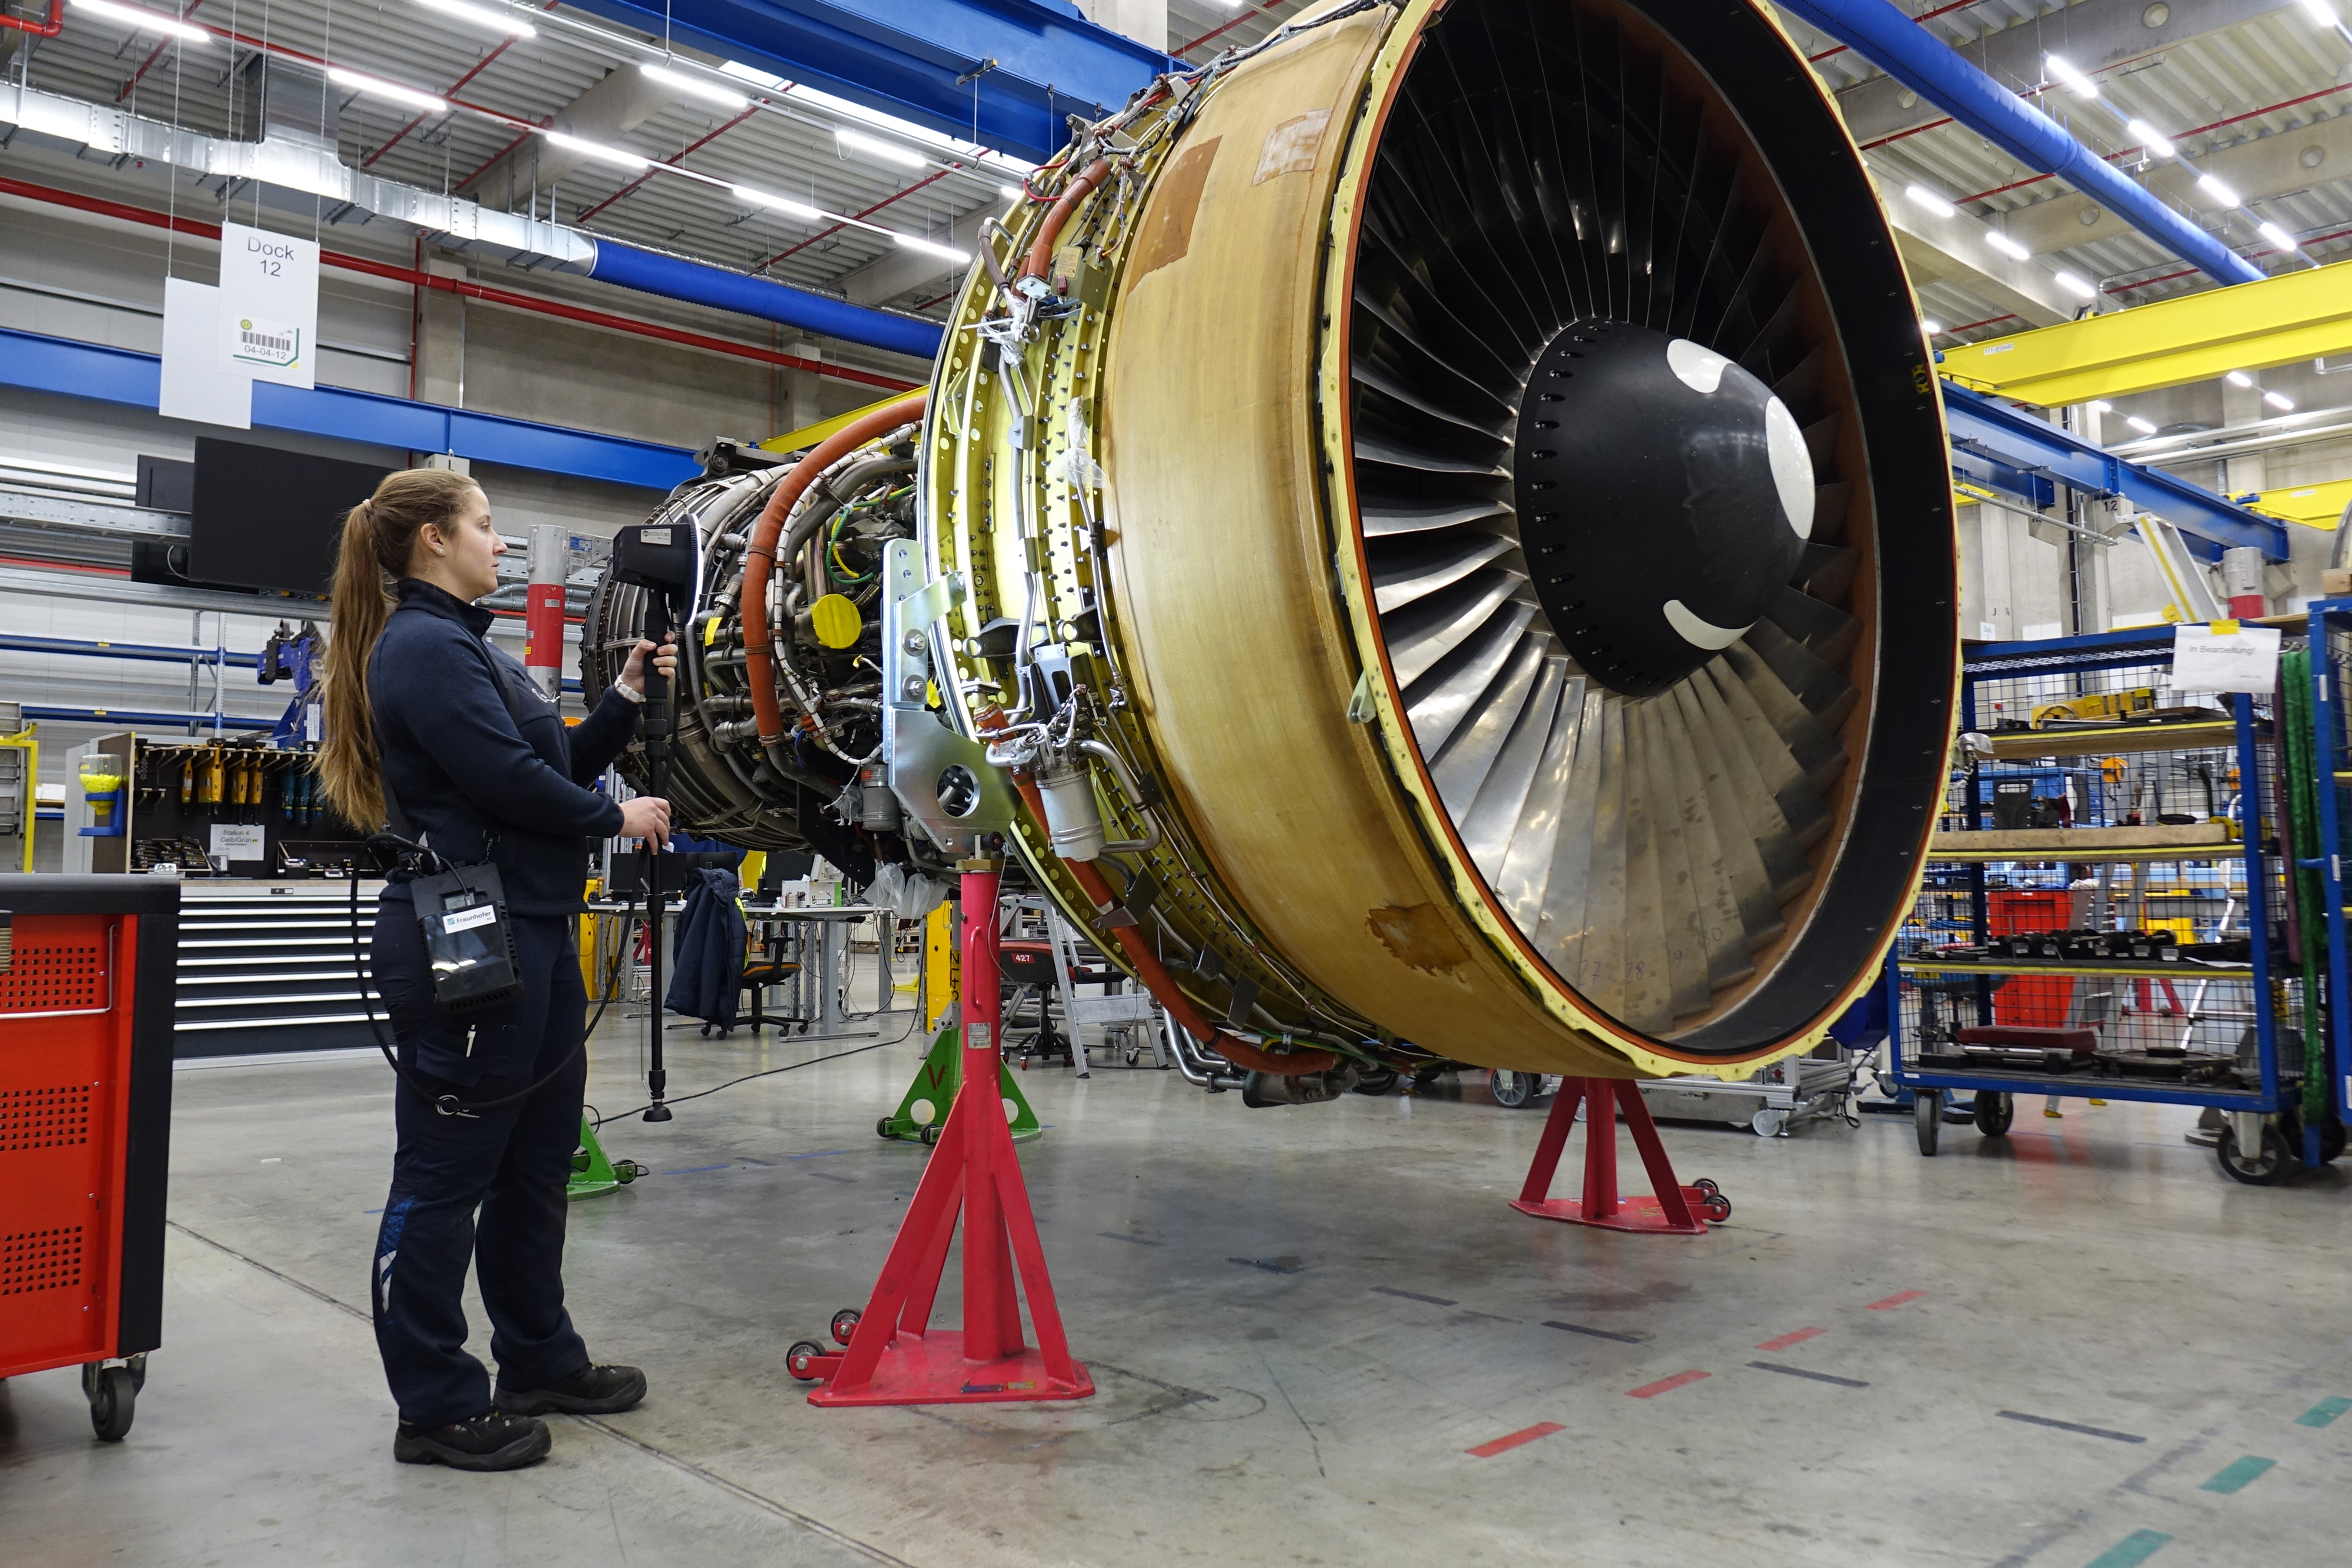
With these requirements in mind, MTU turned to researchers at the Fraunhofer IOF, who have developed a novel 3D scanner. In the future, this scanner will enable flexible, simple and time-saving three-dimensional measurement of engines. Conveniently operated by hand, goSCOUT3D can be guided around the engine to be measured and automatically creates a 3D model containing high-resolution shape, color and texture information. "goSCOUT3D enables a fully automated process during the measurement: from image acquisition to the generation of the complete colored or textured 3D model", explains Dr. Stefan Heist of Fraunhofer IOF. Together with his team, the researcher developed goSCOUT3D.
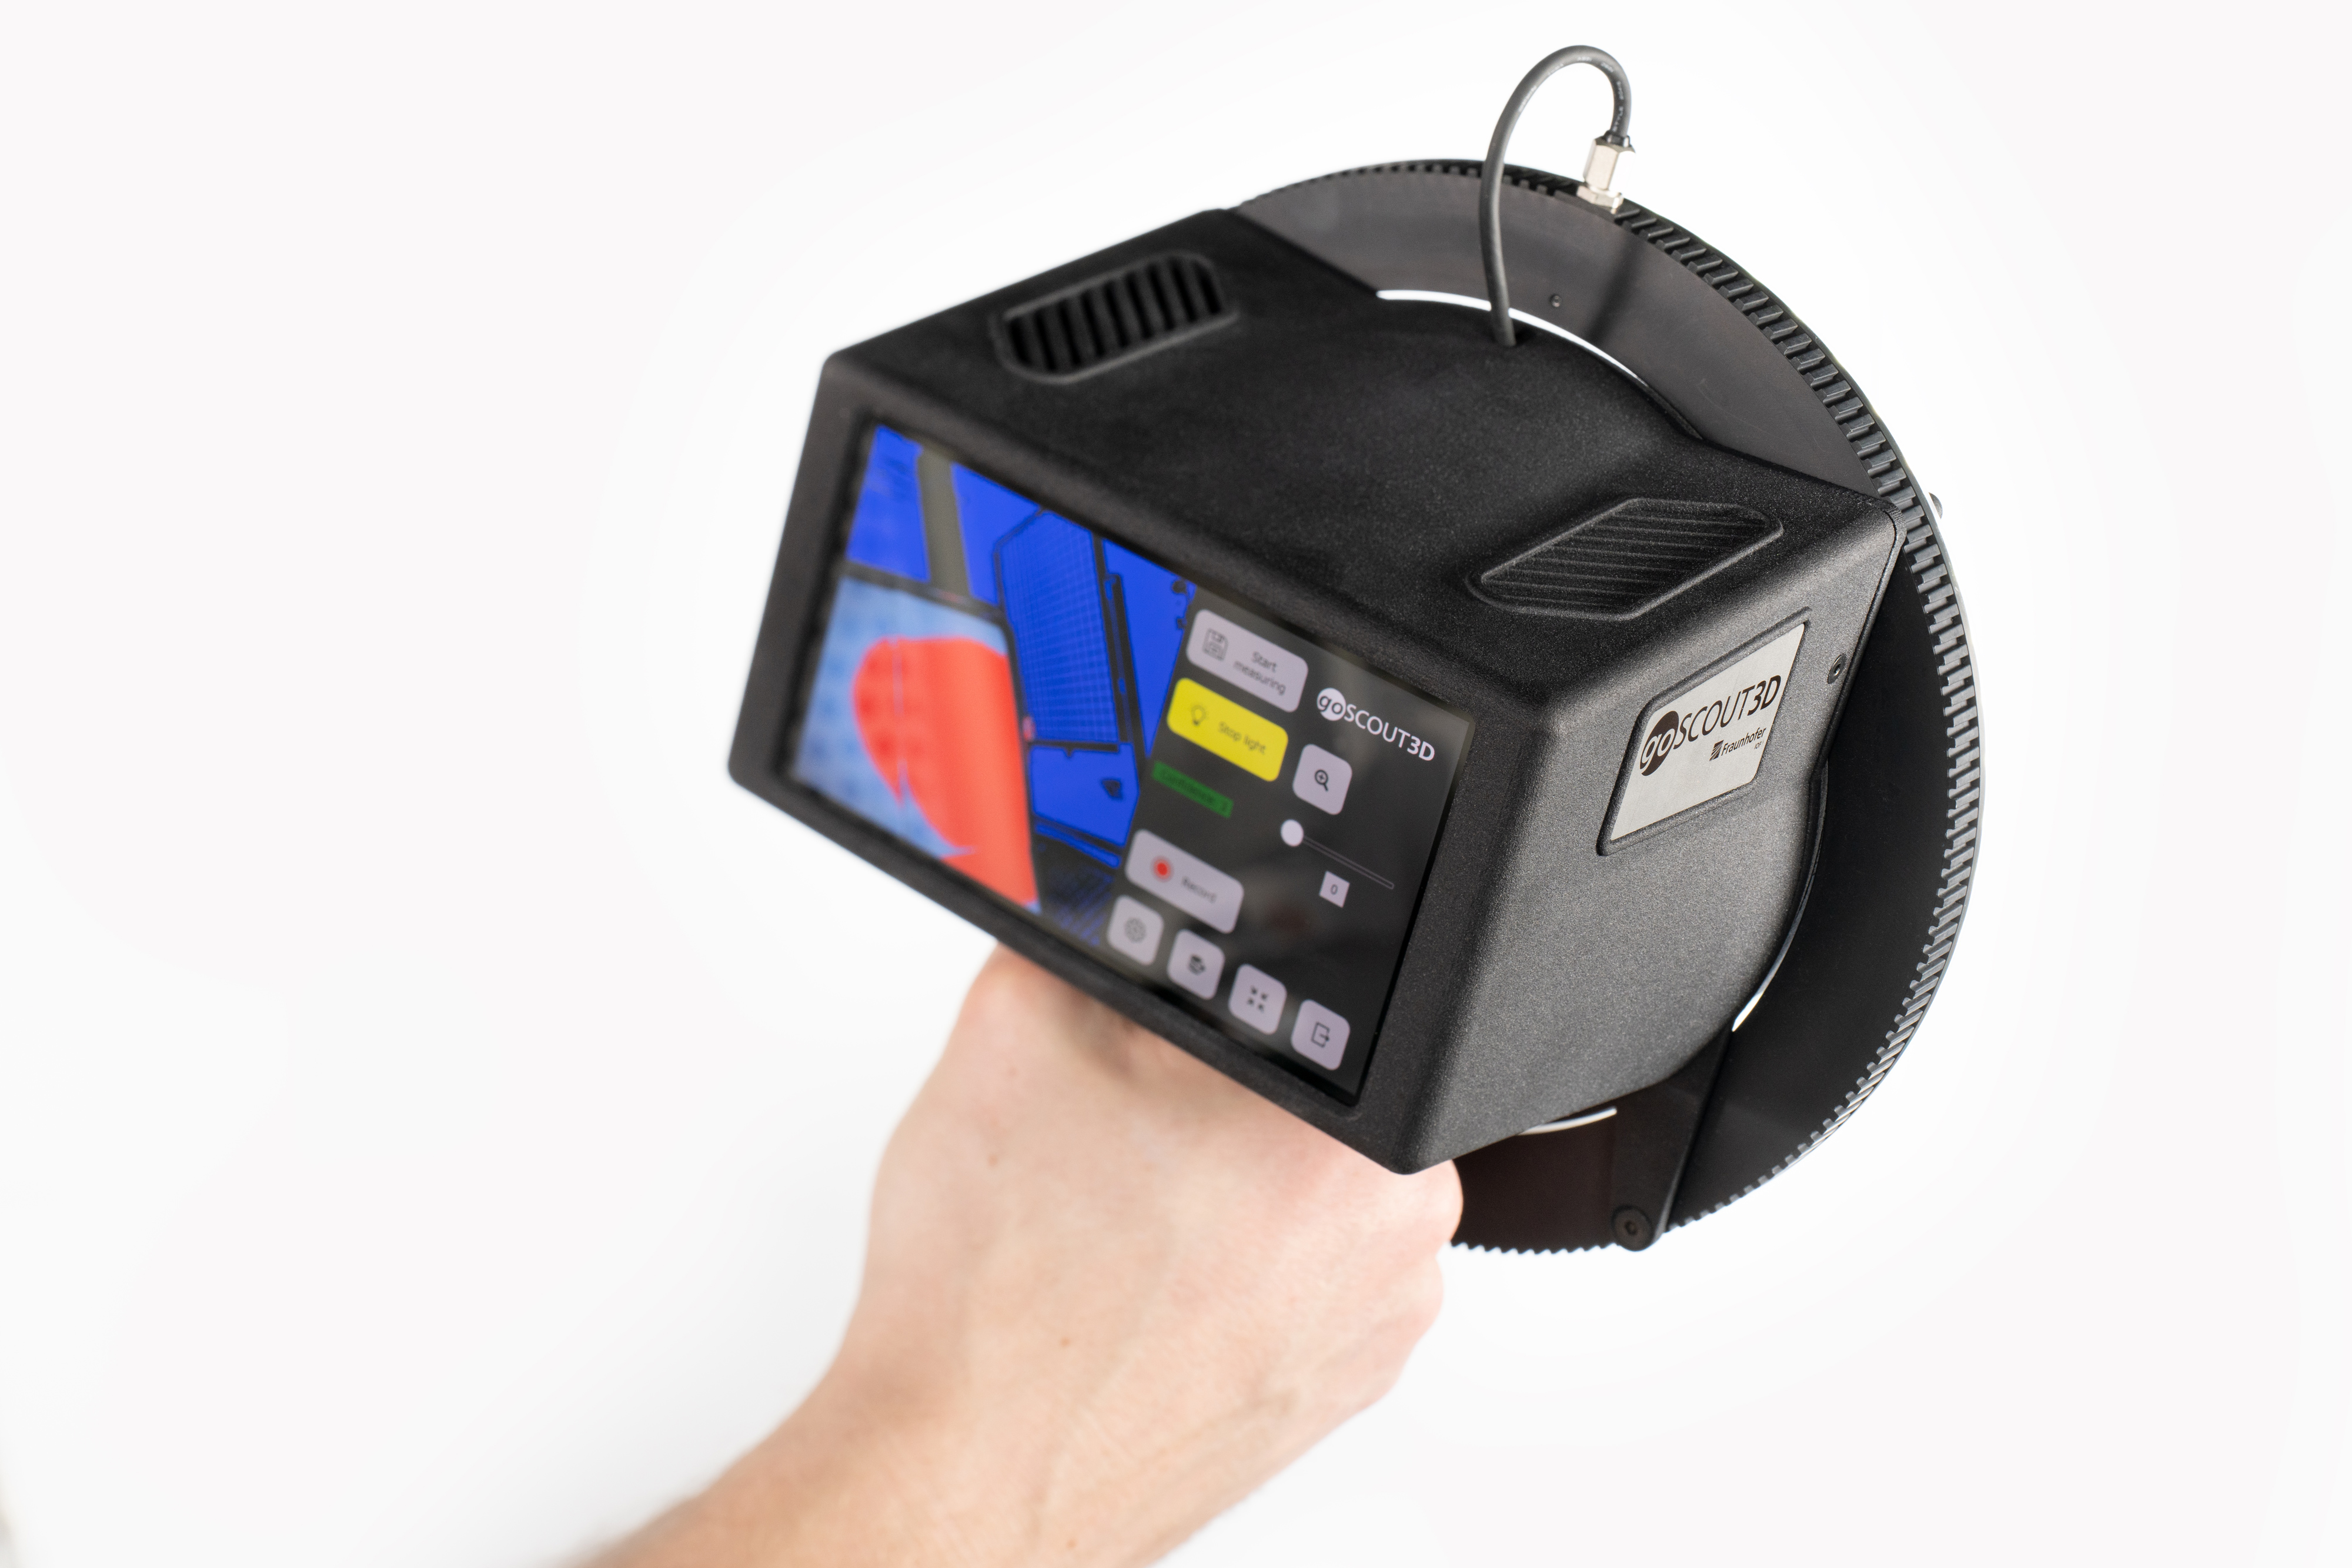
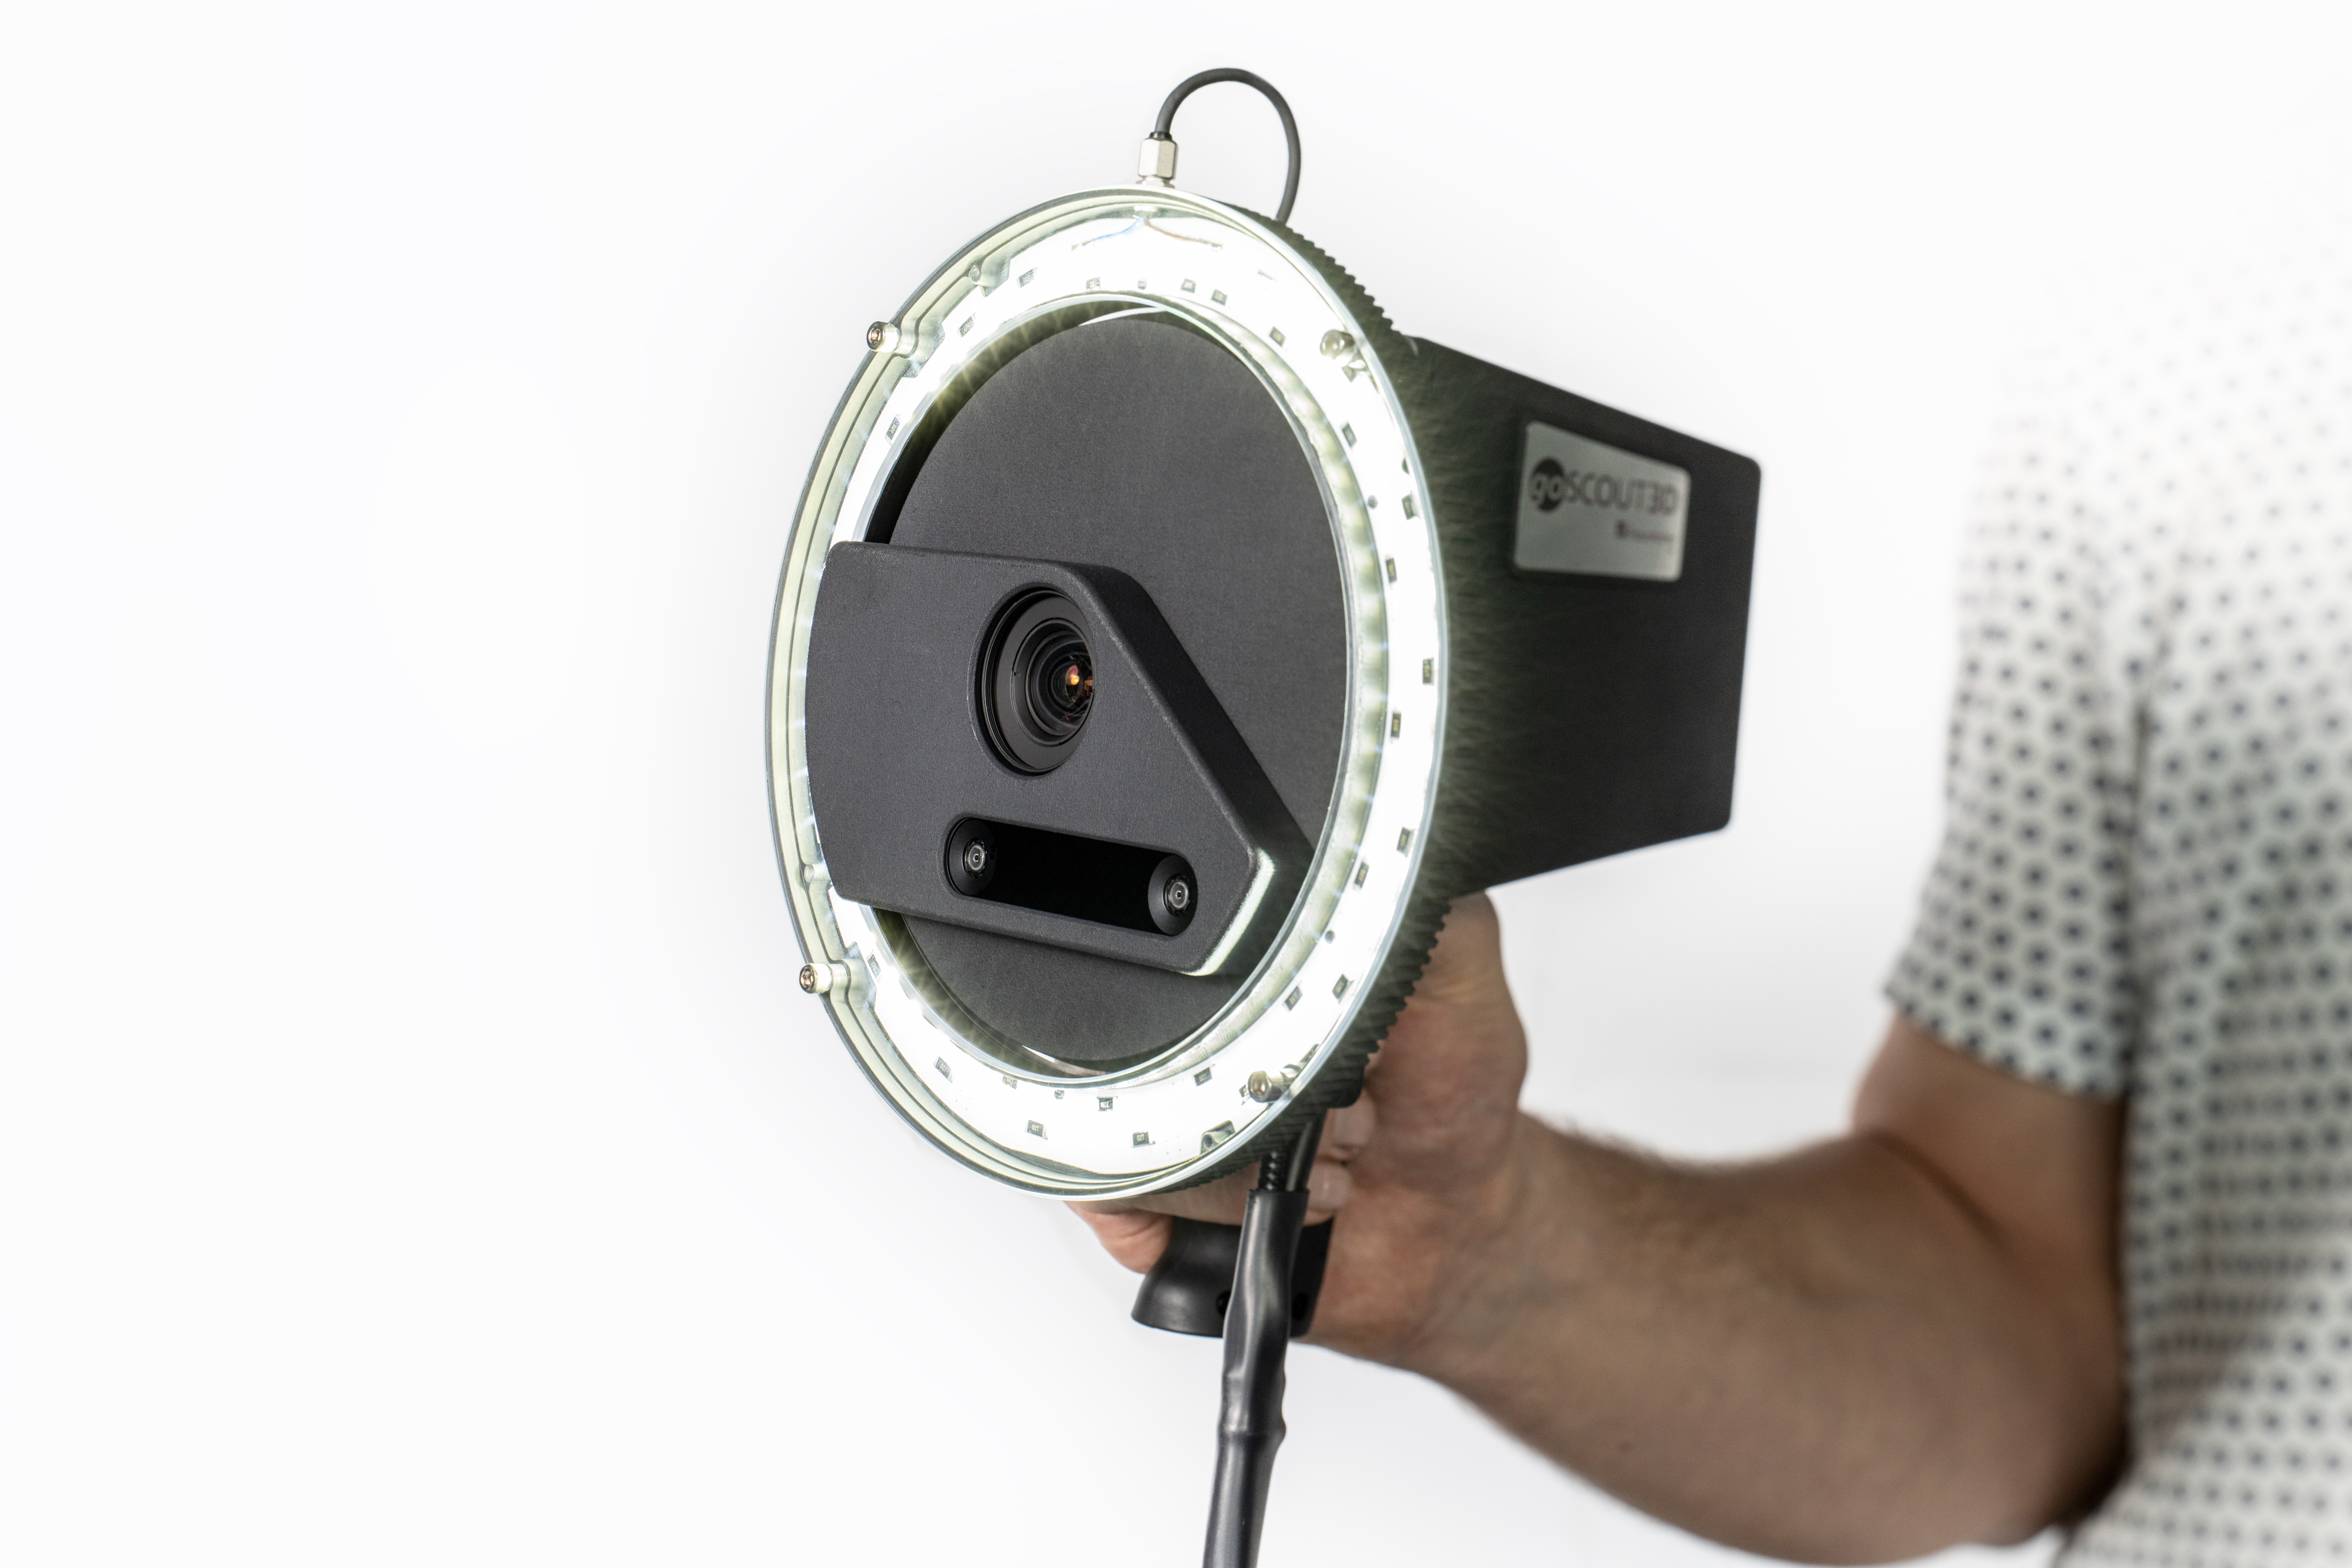
The goSCOUT3D resembles an oversized flashlight - because in addition to a high-resolution color camera as well as an inertial measurement unit (IMU) and a display with touchscreen, a ring light is the most visually striking feature of the new sensor. It is used to illuminate the measurement scene to enable the short exposure times required for handheld operation. "This allows well over one thousand images to be captured and processed. At a standard measuring distance of one meter and an image field of about one square meter, we thus achieve an extraordinarily high recording speed of up to 6 m² of object surface per minute, " explains Marc Preißler, co-developer of goSCOUT3D. The integrated 20-megapixel color camera enables a particularly high spatial resolution of less than 0.25 millimeters. The weight of the sensor head is about 1.3 kg. Power is supplied by rechargeable batteries, which enable uninterrupted operation for several hours. This makes the handheld scanner particularly mobile and flexible to use.
goSCOUT3D extends the principle of photogrammetry
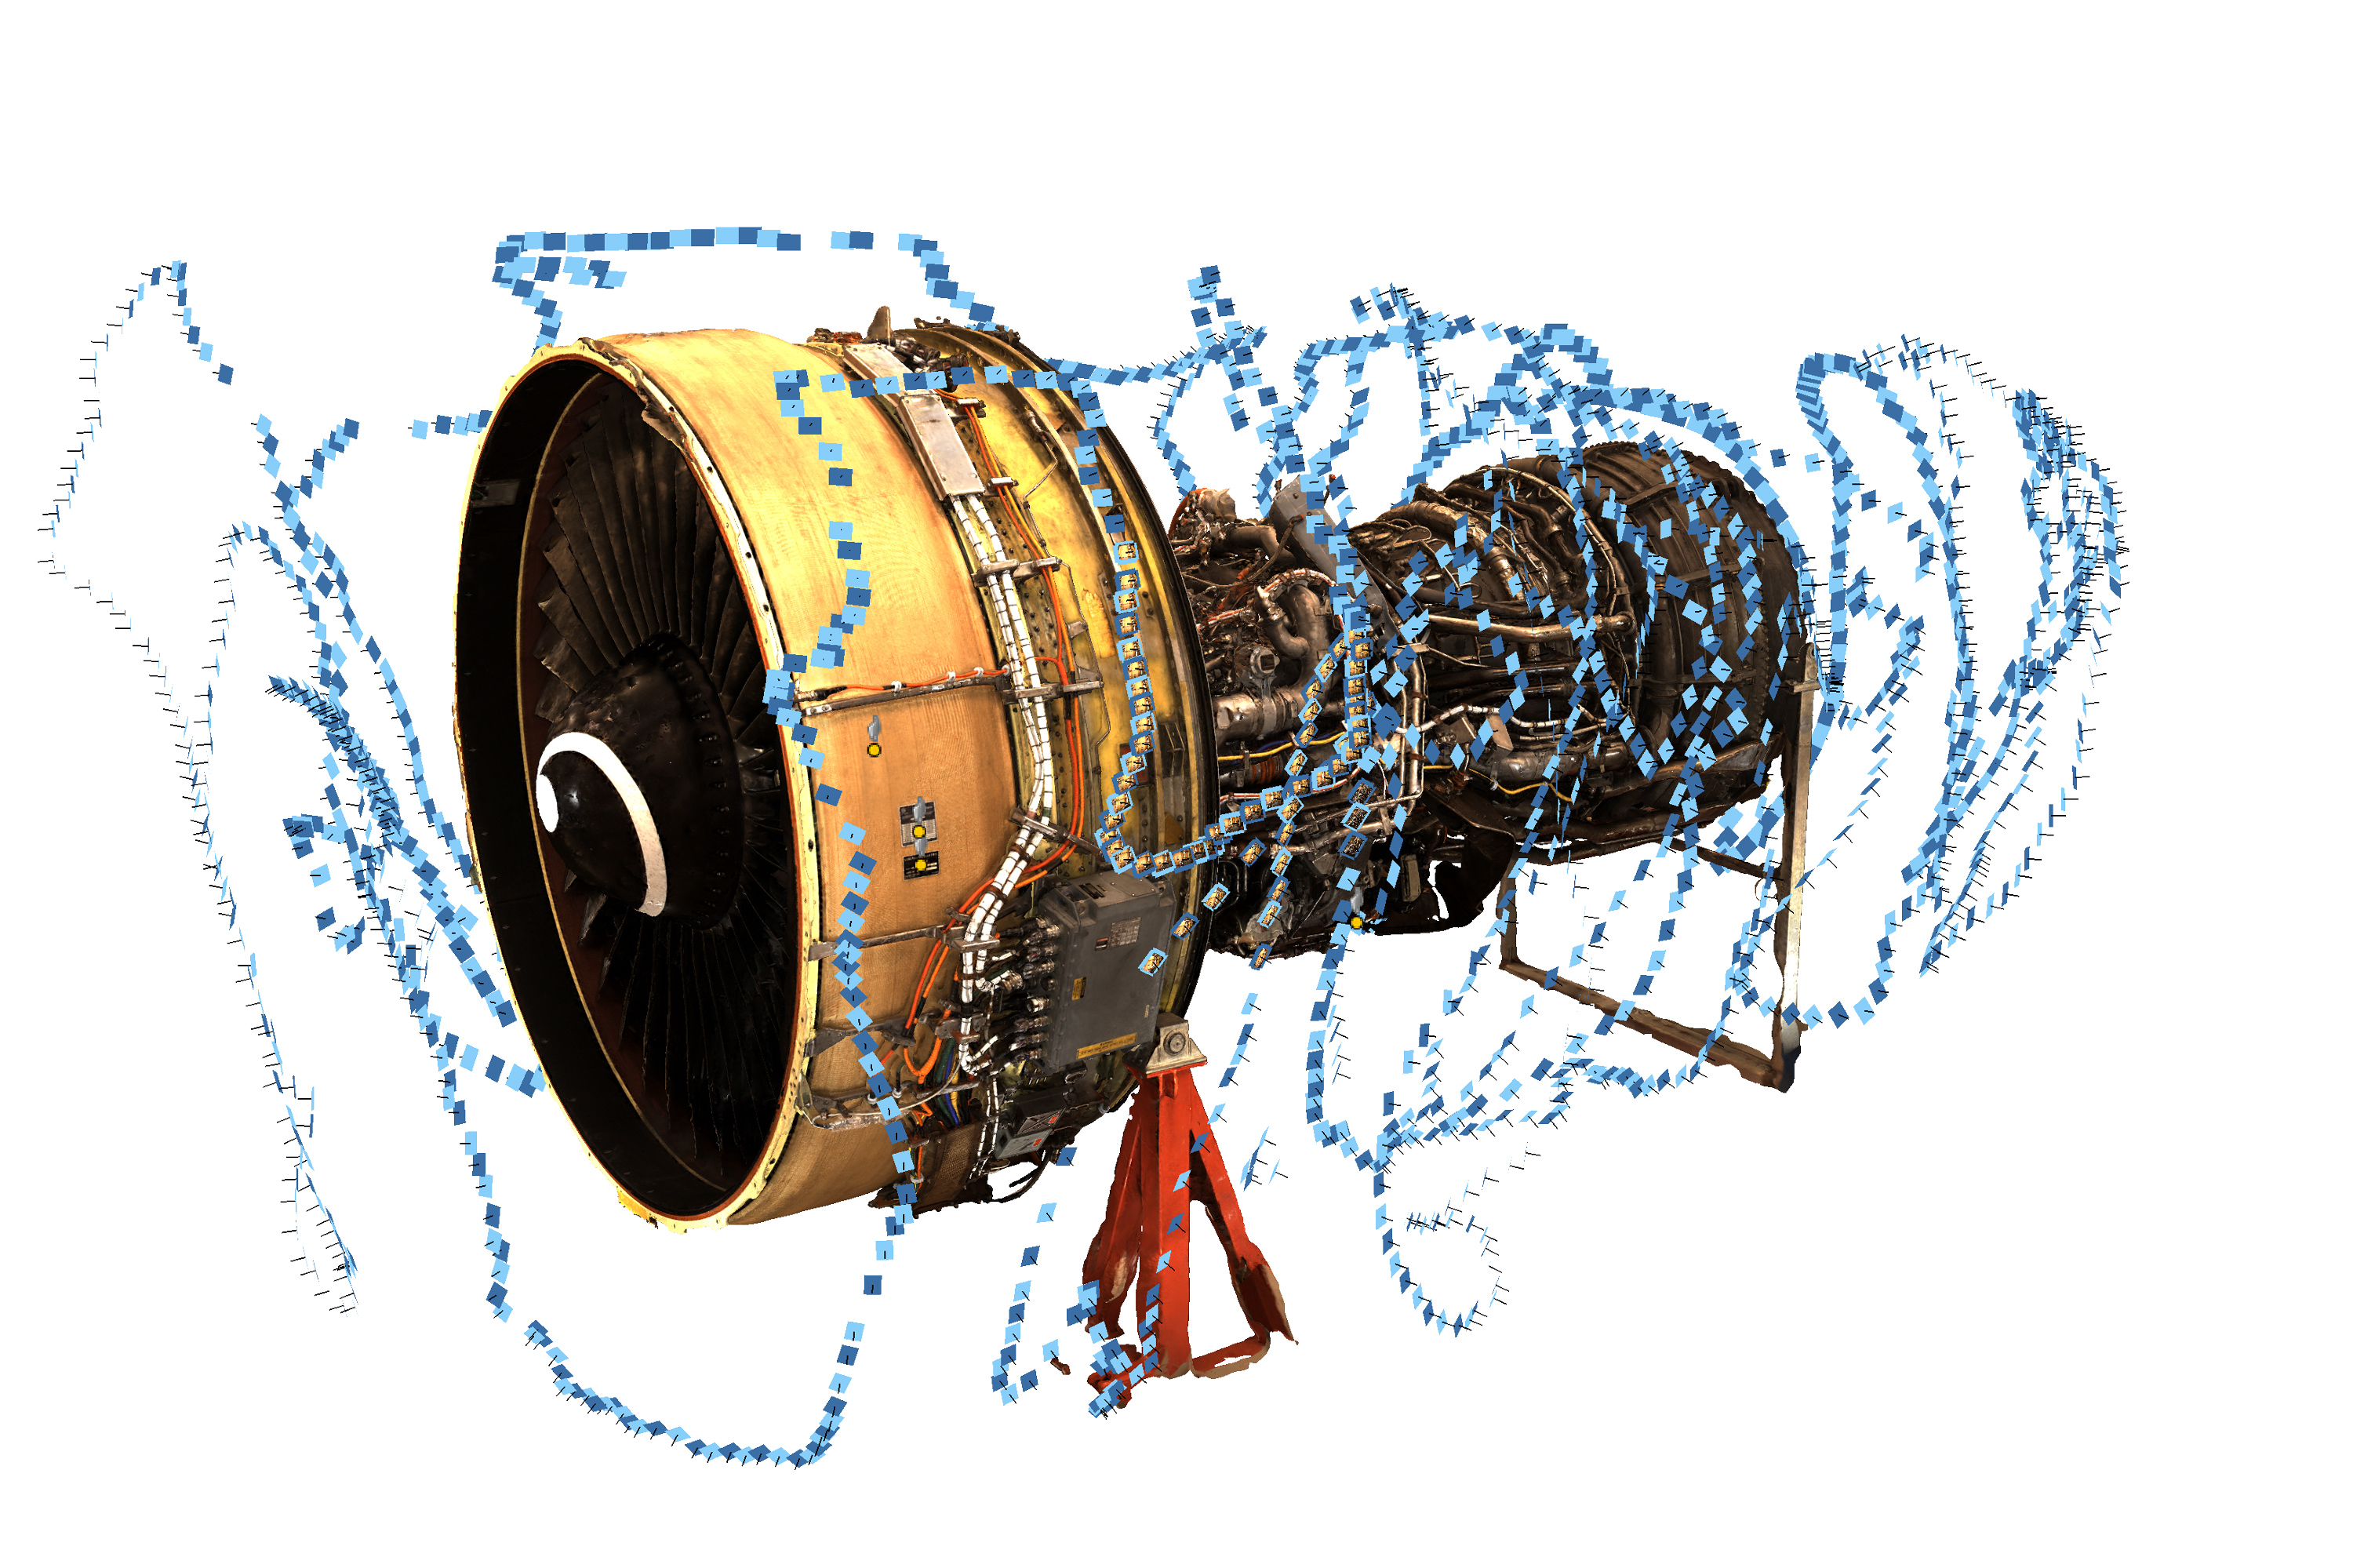
But how exactly does goSCOUT3D generate the desired 3D models? For this purpose, the sensor uses the principle of so-called photogrammetry. "In this measurement method, high-resolution two-dimensional color images of the measured scene are taken from many different angles," explains Stefan Heist. This means: The sensor is guided around the object once manually. "Subsequently, distinctive object points are identified in the photo sequence. If these appear in several images, we can use the principle of triangulation to calculate the associated 3D points and ultimately the 3D data of the entire scene."
A particular challenge for the researchers was the rapid processing of the 2D images. "For the 3D acquisition, a large number of high-resolution individual images of good quality is required. The corresponding processing of these individual images is typically very time-consuming," says Stefan Heist, explaining the initial problem. The researchers from Jena, however, have succeeded in extending the principle of photogrammetry by adding the position and orientation data of an inertial measuring unit (IMU). These allow the rough determination of the sensor movement and thus the selection of images with overlapping image contents. "If one puts this prior knowledge into the photogrammetric evaluation, time can be reduced by more than half, especially for complex measurement objects," summarizes Marc Preißler. This way, a 3D model can already be created within a few minutes.
MTU is highly pleased with the new application. "goSCOUT3D gives us a holistic and detailed view of our engines in 3D and 2D, including navigation options," says Dr. Frank Seidel, head of Repair Development at MTU Maintenance. "The flexible usability of the scanning system in the production environment, the uniform documentation structure when recording the findings data and its use in our quality and analysis tools will lead to a significant increase in efficiency."
Flexible 3D measurement system for digitization and documentation
With goSCOUT3D, however, the researchers have developed a sensor that offers application potential not only in the aerospace industry, but far beyond. By visualizing and analyzing object properties, the scanner lends itself to use in medicine, research and science, or even to provide data for augmented reality applications. "With goSCOUT3D, we are giving users - in the truest sense of the word - a flexible 3D sensor system that offers new possibilities in the digitization and documentation of objects," sums up developer Stefan Heist.
First presentation at trade fairs in Germany and Japan
goSCOUT3D will soon be presented to the public for the first time at two trade fairs: With OPIE'23, Japan invites optics and photonics enthusiasts from all over the world to Yokohama from April 19 to 21. The Fraunhofer IOF booth will be located in the German Pavilion, booth C-32-9. Furthermore, the handheld scanner will be presented at CONTROL, an international trade fair for technologies for quality assurance, from May 9 to 12 in Stuttgart. Here, the Fraunhofer IOF will exhibit at booth 6301 in hall 6.
Last modified:
