Surface Characterization Developments

Light Scattering Analysis for the Optimization of Optical Fabrication
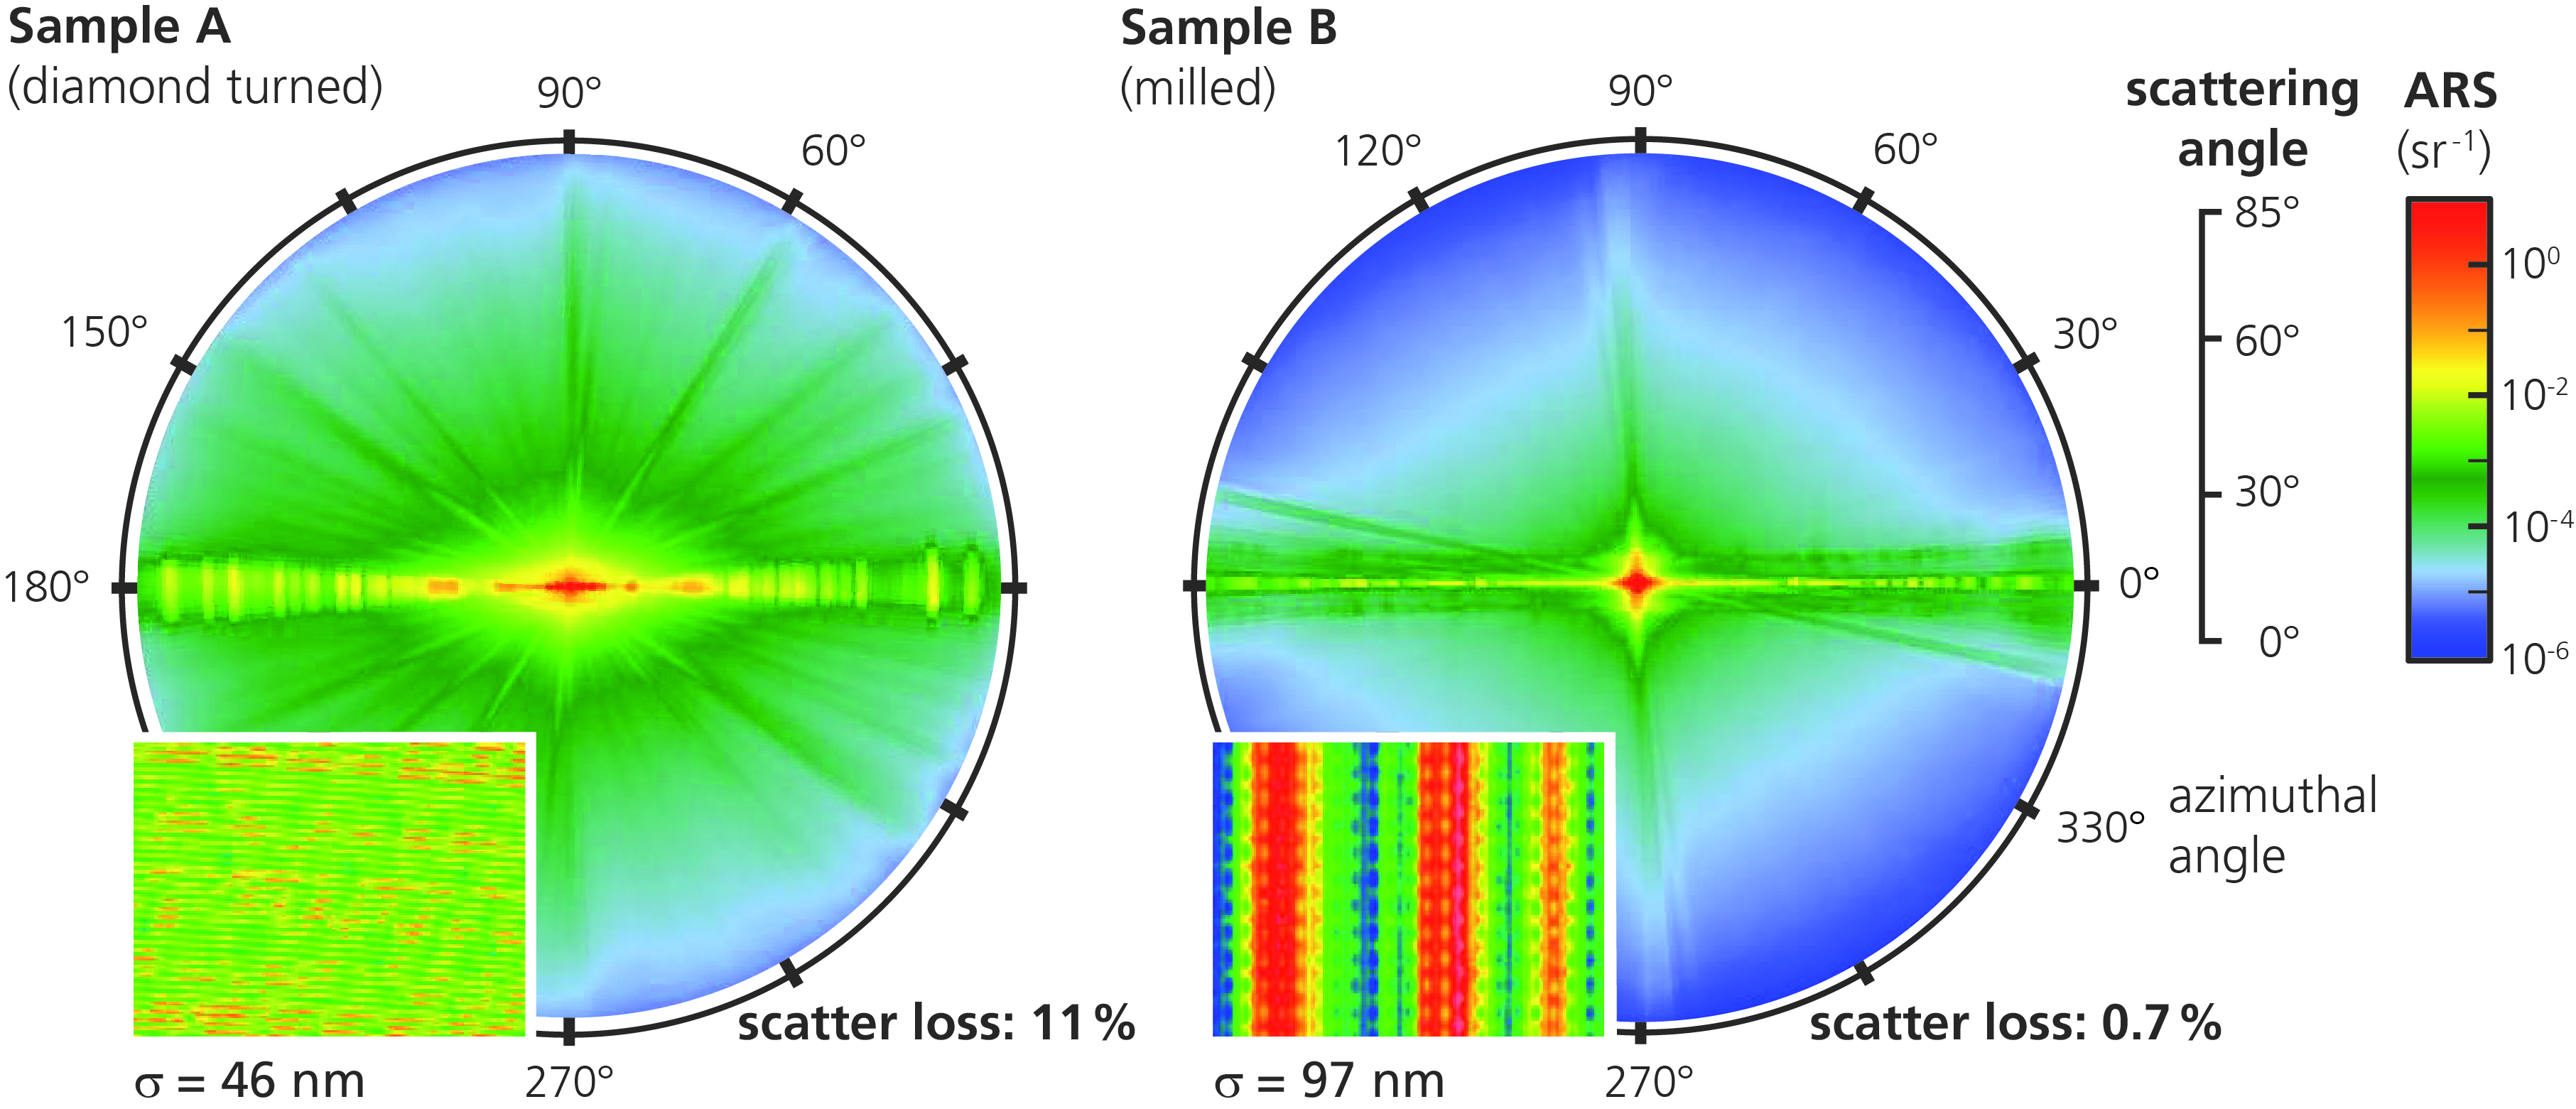
Fig. 1: Hemispherical light scattering measurements and white light interferometer measurements on processed PMMA surfaces for imaging applications.
© Fraunhofer IOF
Fig. 1: Hemispherical light scattering measurements and white light interferometer measurements on processed PMMA surfaces for imaging applications.

The fabrication of optical components with a surface and material quality that is adapted to the application requirements results in time consuming and expensive process chains. On the one hand, insufficient qualities of surface and material increase light scattering losses, decrease image quality, and increase stray light problems. On the other hand, specifications that are too tight lead to unnecessary process and fabrication expenses. Especially for high volume optics, a tailored optimization of the light scattering performance only in the application relevant region of scattering angles often allows relaxed specifications in other regions. This allows either a reduction in production costs while the application relevant quality stays the same, or drastically improving the optical performance with even small changes in the fabrication process. In order to tailor the fabrication processes to the application relevant specifications, a detailed understanding of the optical characteristic is mandatory, especially regarding the relationship between light scattering and surface and material properties.

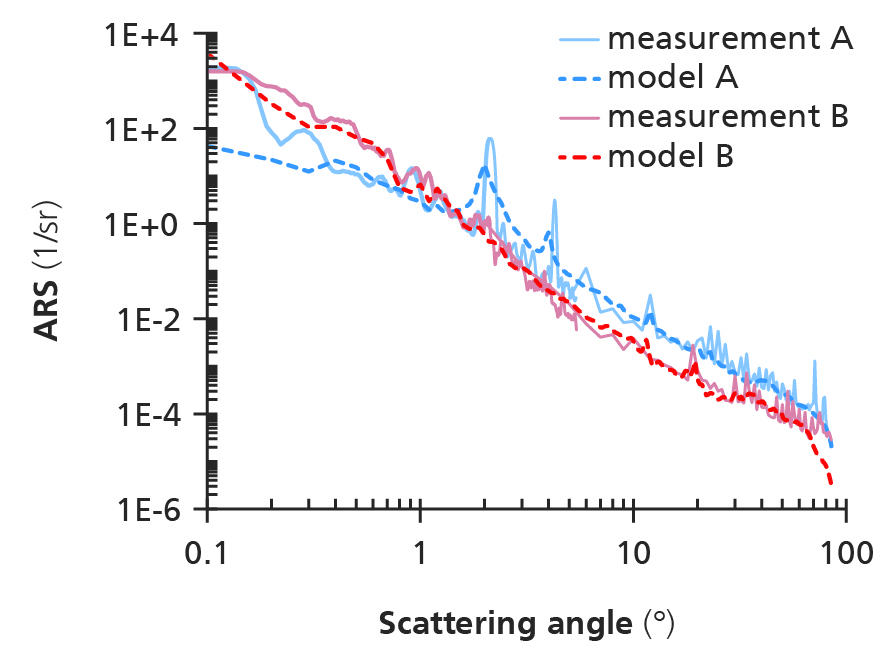
Fig. 2: Model and measurements of the light scattering distributions of surfaces in Fig. 1.
© Fraunhofer IOF
Fig. 2: Model and measurements of the light scattering distributions of surfaces in Fig. 1.

Figure 1 displays angle resolved scattering measurements in the transmission hemisphere as well as topographies obtained by white light interferometry on typical PMMA surfaces processed for illumination optics. The surfaces were fabricated by diamond turning and milling and show highly anisotropic roughness structures. Against intuition, the rougher surface B leads to a smaller total scattering loss (TSf = 0.7 %) between scattering angles of 2° and 85° compared to the smoother surface A (TSf = 11 %). For an in-depth analysis of the light scattering relevant roughness components, the light scattering distributions were also modeled based on white light interferometer and atomic force microscopy measurements (Fig. 2). Measurements and simulation show a very good agreement over the large region of scattering angles. It can be observed that the grooves of surface B mainly contribute scattered light at small scattering angles. Based on the lower scattering losses, surface B would consequently show a better performance for illumination application, while surface A would be more qualified for imaging applications as a result of the lower near angle scattering.


Authors: Alexander von Finck, Nadja Felde, Oliver Dross (Philips Lighting, Eindhoven), Sven Schröder