Research Reports: Additive manufacturing

Recent additive manufacturing developments at Fraunhofer IOF

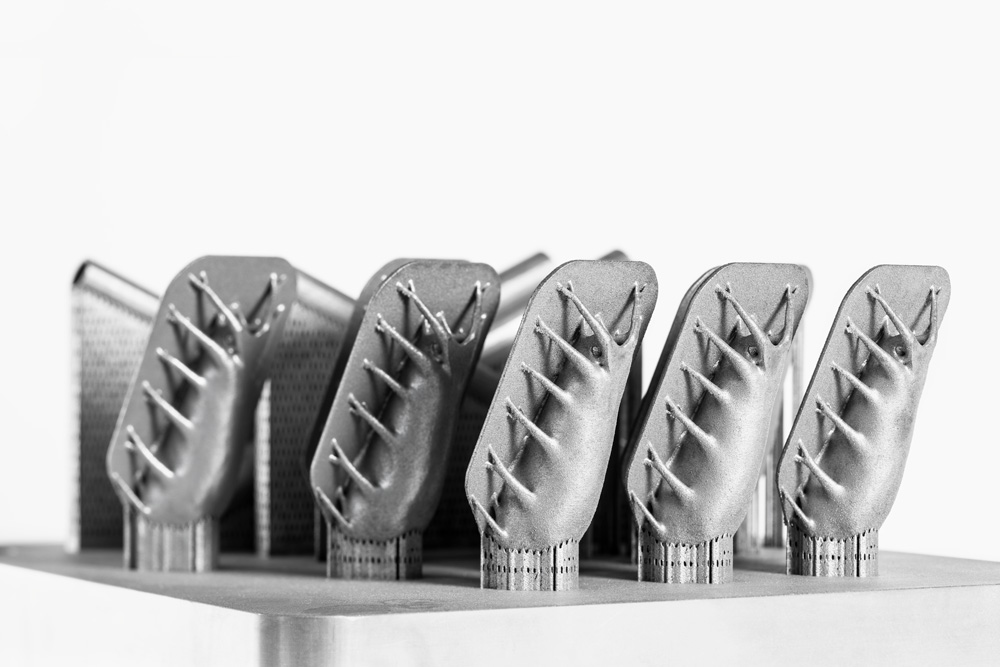
Fraunhofer IOF offers the development and manufacturing of optical components and systems based on metallic materials. One manufacturing process is selective laser melting, which can be used to realize novel and optimized designs for metallic mirror bodies.


Could a lightweight and additively manufactured precision metal component or system be a solution for your problem?

Find out about our technologies and range of services for customers from industry and science by clicking here:

Precision optical components and systems


Below you will find research reports on our recent additive manufacturing developments:

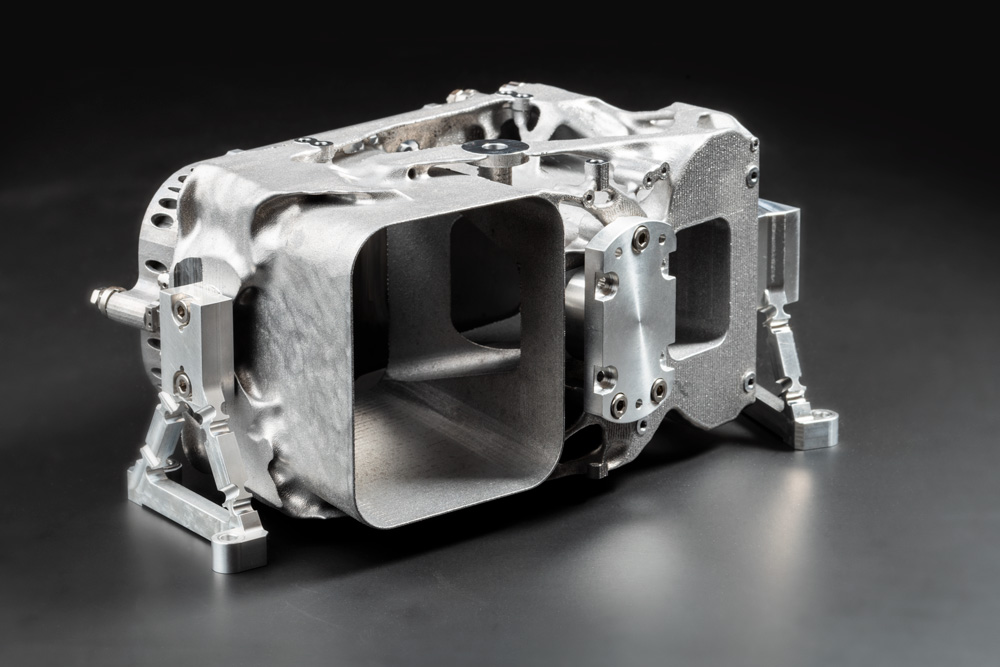
Additive manufacturing for the construction of precision metallic components and systems.
© Fraunhofer IOF
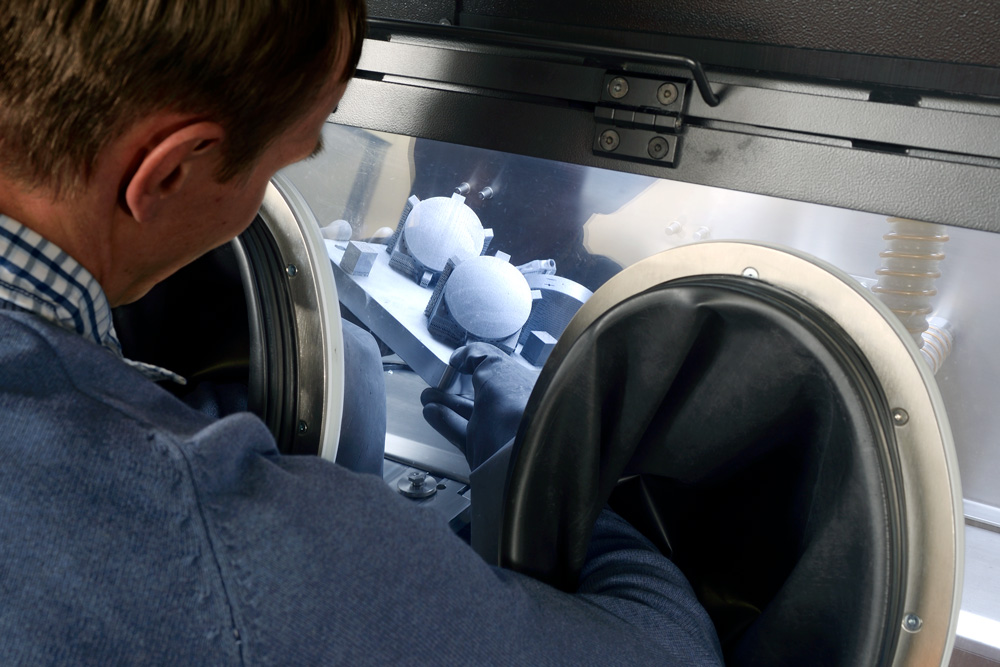
Research is being conducted at the Fraunhofer IOF into the further development of metal additive manufacturing for the construction of precision components and systems.

Additive manufacturing of high-performance optics

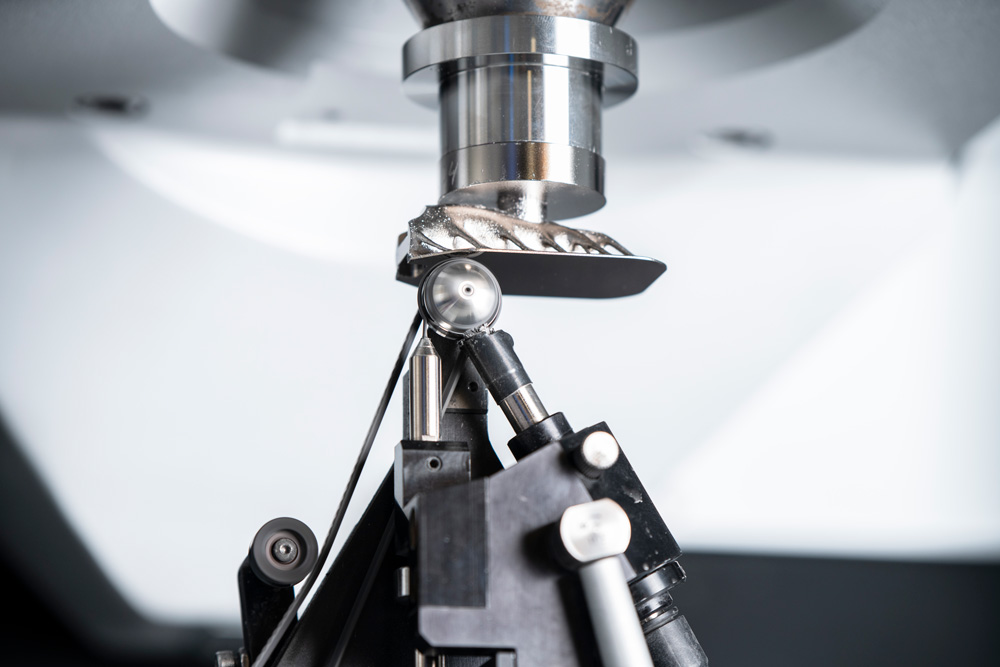
EUV-mirror with integrated cooling structure on UP machine.
© Fraunhofer IOF
Additively manufactured EUV-mirror with integrated cooling structure on UP machine.


High-performance optics must fulfill high optical requirements as well as different mechanical and thermal specifications. By using the benefits of the selective laser melting process, novel and optimized designs for metal mirror base bodies can be designed and additively fabricated. The successful implementation of the base bodies into the process chain for the manufacturing of high-performance metal optics made from an Aluminum-Silicon material (AlSi40) is demonstrated on three different demonstrators.

Using an internal, honeycomb-like structure, a mirror base body for space applications weighs less than 35 g (Fig. 1), realizing a weight reduction of 57 % compared to a solid model. After coating the mirror with an electroless nickel polishing layer, an ultra-precise diamond turning step, and a final shape correction (MRF polishing) of the optical surface, the optical performance was achieved with a roughness below 2 nm RMS (50x WLI) and a shape deviation within the specified area (Ø 14 mm) below 30 nm PV.

For an application in the area of EUV lithography, the second optic must be optimized for high power usage by integrating a highly efficient cooling structure.

It has been proven that complex internal channels can be made additively and used for this application. For EUV lithography, the extreme optical requirements could be realized by a special polishing technique to obtain a roughness of below 0,3 nm RMS (AFM 10 x 10 μm²). Thus, a multilayer coating could be deposited, achieving a reflectivity of above 67.4 % at 13.5 nm wavelength.

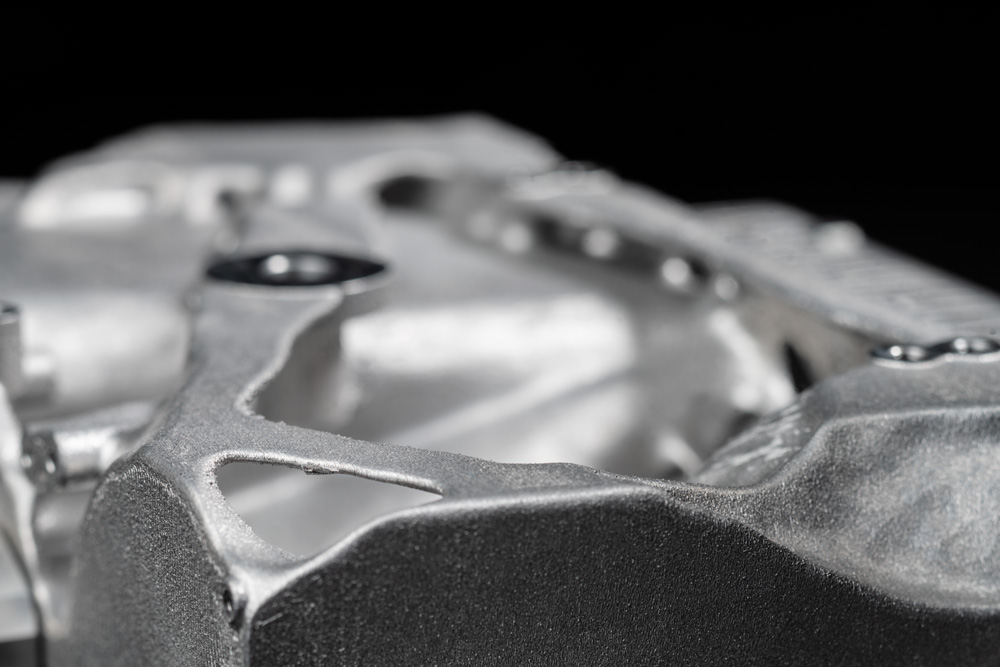
Topology optimization of a design for a high dynamic scanning mirror for laser material processing applications resulted in a bionic backside structure and led to an optical surface with a wall thickness of only 700 μm (Fig. 2). The design comprises a minimized moment of inertia and was realized by additive manufacturing and the successive process chain. Optical requirements are fulfilled by realizing a shape deviation of below 150 nm PV. The innovative design improves the dynamic characteristic compared to a conventional used fused silica scanning mirror by a factor of 2.


Acknowledgment
The research project “AM-OPTICS” is funded by the German Federal Ministry of Education and Research (BMBF) within the Program “Innovations for Tomorrow’s Production, Services, and Work” (02P15B204) and managed by the Project Management Agency Karlsruhe (PTKA).
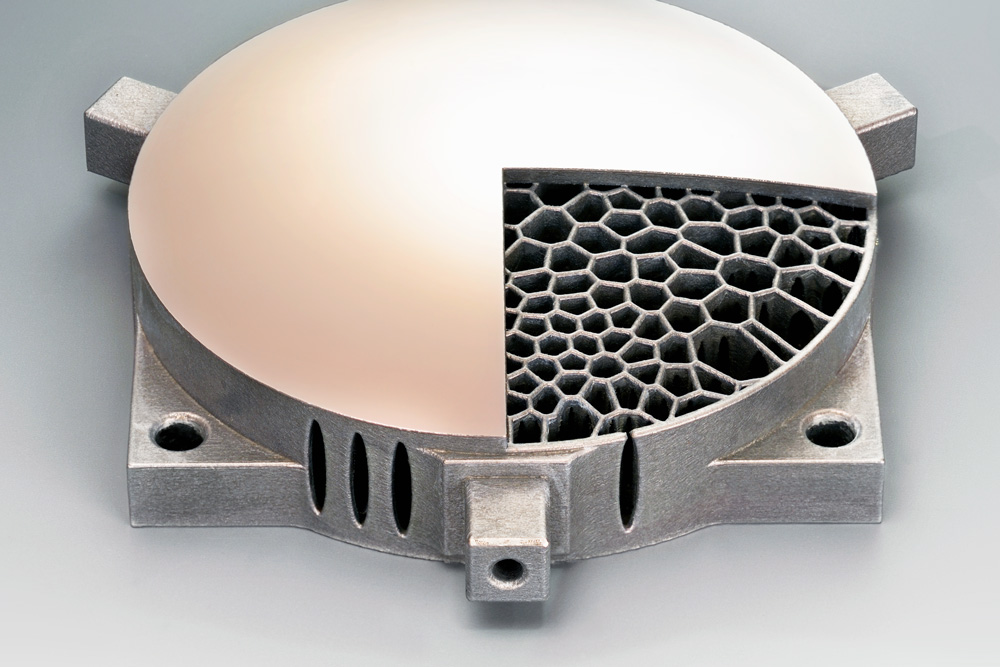
 

Light-weighted mirror for space applications after ultraprecision machining.
© Fraunhofer IOF
Fig. 1: Light-weighted mirror for space applications after ultraprecision (UP) machining.
Bionic scanning mirror on polishing machine.
© Fraunhofer IOF
Fig. 2: Bionic scanning mirror on polishing machine.


Authors: Nils Heidler, Enrico Hilpert


Further research reports on additively manufactured metal optics and systems


The articles listed below underline, among other things, the intensive research activities of our experts at Fraunhofer IOF. These articles are published in our annual reports, which contain selected research results from the corresponding years (archive annual reports).

In the following list you will find the articles on developments regarding metal additive manufacturing from the past years:


Additive manufacturing of metal optics and systems

A complete three-mirror anastigmatic telescope made by additive manufacturing.
© Fraunhofer IOF
A complete three-mirror anastigmatic telescope made by additive manufacturing.


Additive manufacturing (AM) technologies offer novel concepts regarding functionality and design, without being limited by restrictions that arise from conventional manufacturing technologies. This enables the  realization of more complex lightweight structures and an optimized load adapted structural design. For the first time, a complete three-mirror anastigmatic telescope was manufactured by additive manufacturing (Fig. 1). Mirrors and housing consist of a silicon particle-reinforced aluminum material, which is generated by laser powder bed fusion. The system consists of three mirrors, two of them are placed onto a single substrate. The mirrors are mass reduced in the interior using stochastic structural design. The dual mirror substrate exhibits a mass reduction of 65 %. After AM, cleaning, and mechanical fabrication of reference and mounting surfaces, the mirrors were processed using an established manufacturing chain for metal mirrors, including precision diamond turning and magnetorheological finishing. A final shape deviation of < 100 nm peak-to-valley on a single mirror was achieved and the measured roughness is < 2 nm in a measurement area of 140 x 110 μm².

The primary telescope housing was derived from a conventional lightweight design, which is mass reduced by cutting techniques. The new design was generated by topology optimization, which led to a nearly doubled stiffness-to-mass ratio. This parameter is an important value to evaluate mechanical parts for space applications. Mass is the main factor in the design phase, while the stiffness also must be optimized to sustain high loads during launch. Eigenfrequencies of the equipment have to differ significantly from the main excitations generated by the launch vehicle. Numerical simulations of the system were verified by shaker tests. The simulated first eigenfrequency measures 1979 Hz, which was confirmed by mechanical vibration tests that yielded a frequency of 1965 Hz.


Integrated assembly with topology optimized frame.
© Fraunhofer IOF
Fig. 1: Integrated assembly with topology optimized frame.
Detailed view of the additively manufactured system with mounted mirror and frame.
© Fraunhofer IOF
Fig. 2: Detailed view of the additively manufactured system with mounted mirror and frame.


Authors: Henrik von Lukowicz, Enrico Hilpert, Nils Heidler

Additive manufacturing of metal optics

Additively made scanning mirrors.
© Fraunhofer IOF
Additively made scanning mirrors.


Applications for metal optics include scientific instrumentations for earth observation, scan mirrors for laser material processing, or high power tools e.g. for EUV-lithography. The commonly used subtractive approaches are subject to severe limitations regarding the design of those mirrors. Additive Manufacturing (AM) of metal optics using selective laser melting is used to realize optimized mirror bodies. The layer wise built up of parts by AM is able to avoid these limitations.

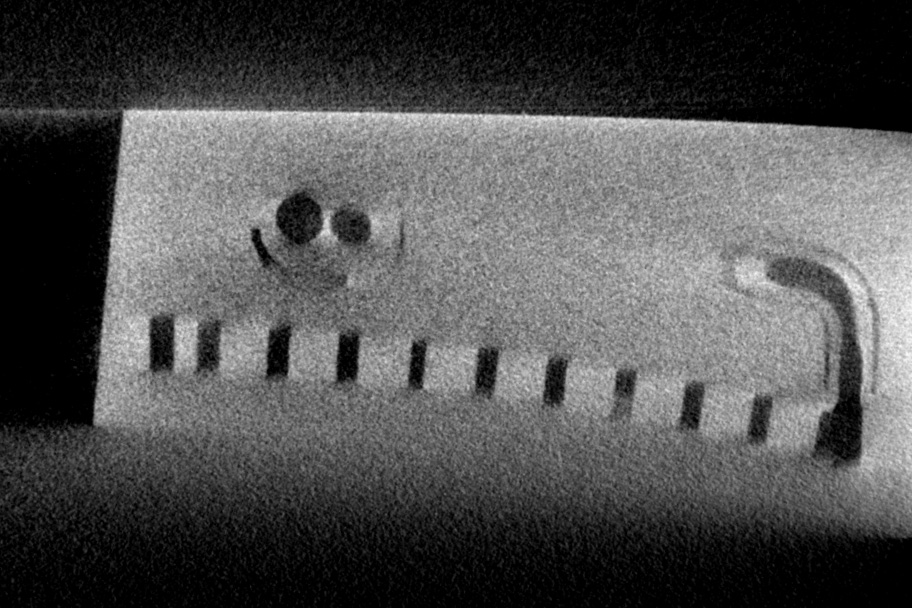
After extensive process studies, optimized parameters for the processing of the powder based raw material have been evaluated. The processing of aluminium-silicon material with a high silicon content of up to 40 % (AlSi40) is possible, realizing a very low porosity of 0.05 %. Studies of material samples show a Young’s modulus of 100 GPa and a tensile strength Rm of 260 MPa. The mechanical values are better than the conventionally manufactured semi-finished products. The coefficient of thermal expansion of AlSi40 is matched to the successively applied polishing layer, minimizing thermal induced bending effects. Computer tomographic measurements (CT) enable the geometric testing of internal volumes and complex structures of the manufactured parts.

The direct integration of cooling channels into high power optics enables a uniform temperature distribution even for high thermal loads. The disadvantages of conventional methods such as additional bonds or uneven distances to the optical surface can be eliminated by AM.

Topologically optimized designs allow scan mirrors to achieve improved torsional frequencies (12 kHz), enabling higher scan speeds and thus more efficient laser material processing.

The reduction of mass while retaining the mechanical stiffness of mirrors is a major advantage for space applications. Mass savings of up to 70 % can be achieved.

The additively made mirror bodies are processed using the established production chain for optical components including diamond turning, coating, and polishing. After the final processing using the established technology chain (diamond processing – magnetorheological polishing – chemical-mechanical polishing), shape deviations of less than 150 nm peak-to-valley and surface roughnesses of < 1 nm RMS have been achieved.


Acknowledgement
The research project “AM-OPTICS” is funded by the German Federal Ministry of Education and Research (BMBF) within the Program “Innovations for Tomorrow’s Production, Services, and Work” (02P15B204) and managed by the Project Management Agency Karlsruhe (PTKA).
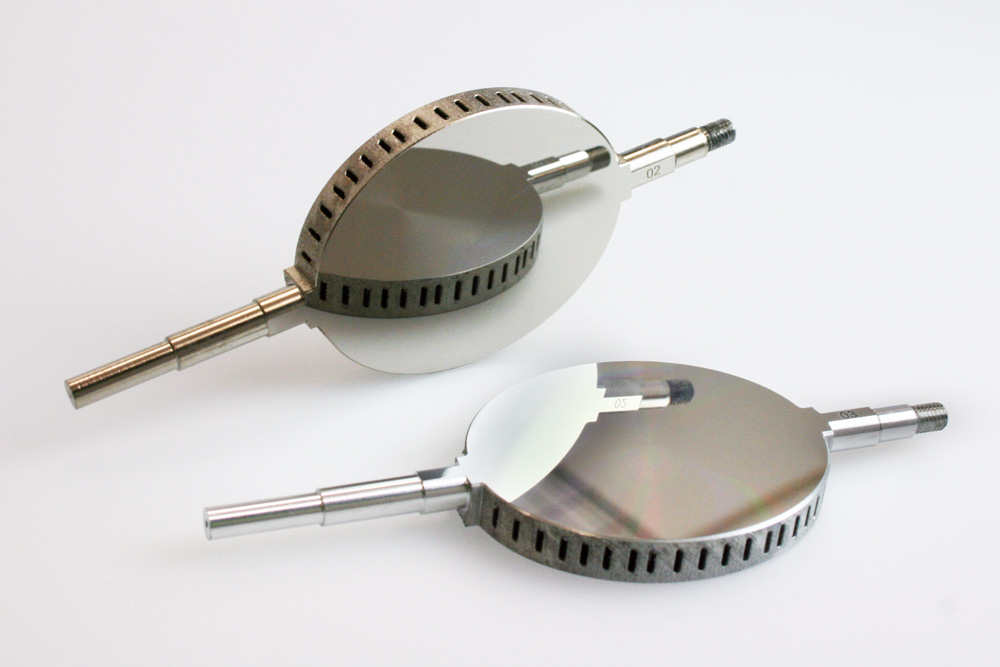
 

The front side of the additively manufactured scanning mirrors.
© Fraunhofer IOF
Fig. 1: The front side of the additively manufactured scanning mirrors.
The back side of the additively manufactured scanning mirrors.
© Fraunhofer IOF
Fig. 2: The back side of the additively manufactured scanning mirrors.
Computer tomographic measurement of AM high power mirror with internal cooling channels.
© Fraunhofer IOF
Fig. 3: Computer tomographic measurement of AM high power mirror with internal cooling channels.


Authors: Henrik von Lukowicz, Enrico Hilpert, Nils Heidler

Additive manufacturing of lightweight metal mirrors

Lightweight demonstrator after diamond-based ultra-precision processing.
© Fraunhofer IOF
Lightweight demonstrator after diamond-based ultra-precision processing.


Many scientific instruments for earth observation or spectroscopic studies of the earth’s atmosphere are based on metal mirrors. In addition to the requirements for the optical performance and the mechanical characteristics of the mirror, the mass budget is also an important specification. Established approaches for lightweight designs are based on the material removal using cutting technologies. Based on the geometry and the area of material removal, mass savings of 30 % up to 50 % can be achieved. When machining the rear side, a negative impact on the stiffness of the mirror must be taken into account.

A new method of manufacturing metal optics is the powder-bed based technology of Selective Laser Melting (SLM). Individually designed lightweight structures can be realized by this additive manufacturing technology, enabling a mass reduction of up to 70 %. By keeping the outer surface of the mirror almost completely closed, very stiff designs can be achieved.

Complex internal lightweight structures can be designed with a variety of configurations, which can be analyzed and optimized during the CAD process. Besides the traditional periodic structures, topology optimized approaches can be used. These optimized structures are based on the possibility to selectively increase the material fraction in areas of high mechanical stress and save material in other areas. Therefore, it is possible to use tailored designs for specific load cases. The material selection for the SLM process is optimized to enable an athermal design. The aluminum-silicon material with a high silicon content of 40 % can be processed with a very low final porosity of < 0.01 %. The mechanical stability of the additive manufactured mirrors was verified by shock and vibration tests.

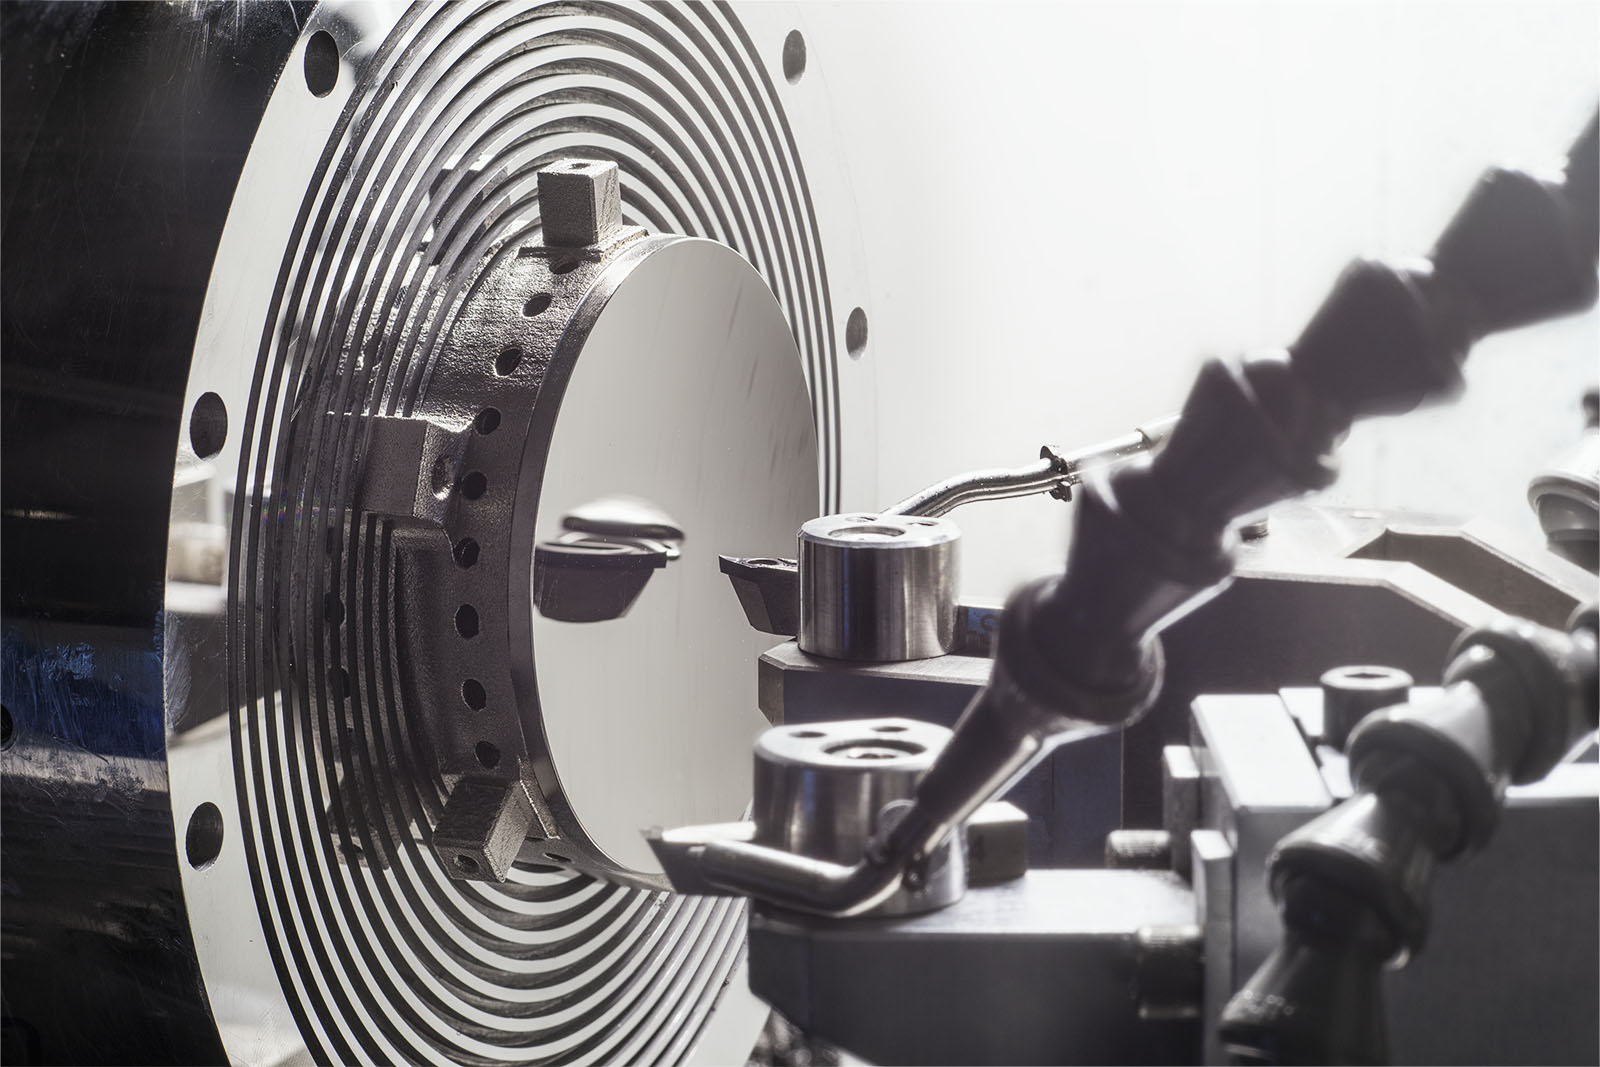
The additively made base-body can be handled with the well-established opto-mechanical process chain for metal mirrors. The machining of the optical surface with ultra-precision diamond turning, as well as the coating with electro-less nickel, is possible. After finishing with magneto-rheological polishing, achievable shape deviations are below 150 nm peak-to-valley and a roughness of 2 nm rms was achieved.


Acknowledgement
Parts of the work were funded by the German Aerospace Center (DLR) within the project ultraLEICHT under grant number 50EE1408.


Additively manufactured lightweight demonstrator.
© Fraunhofer IOF
Fig. 1: Additively manufactured lightweight demonstrator before diamond-based ultra-precision processing.
Ultra-precision processing machine with lightweight demonstrator.
© Fraunhofer IOF
Ultra-precision processing machine with lightweight demonstrator.


Authors: Nils Heidler, Enrico Hilpert, Johannes Hartung, Stefan Risse

Lightweight mirrors

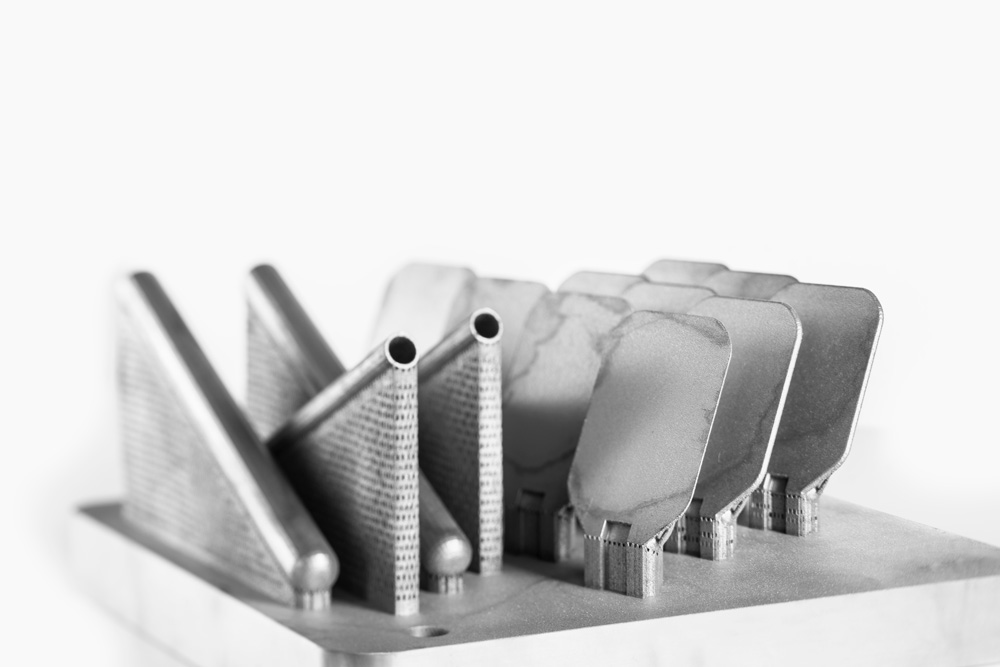
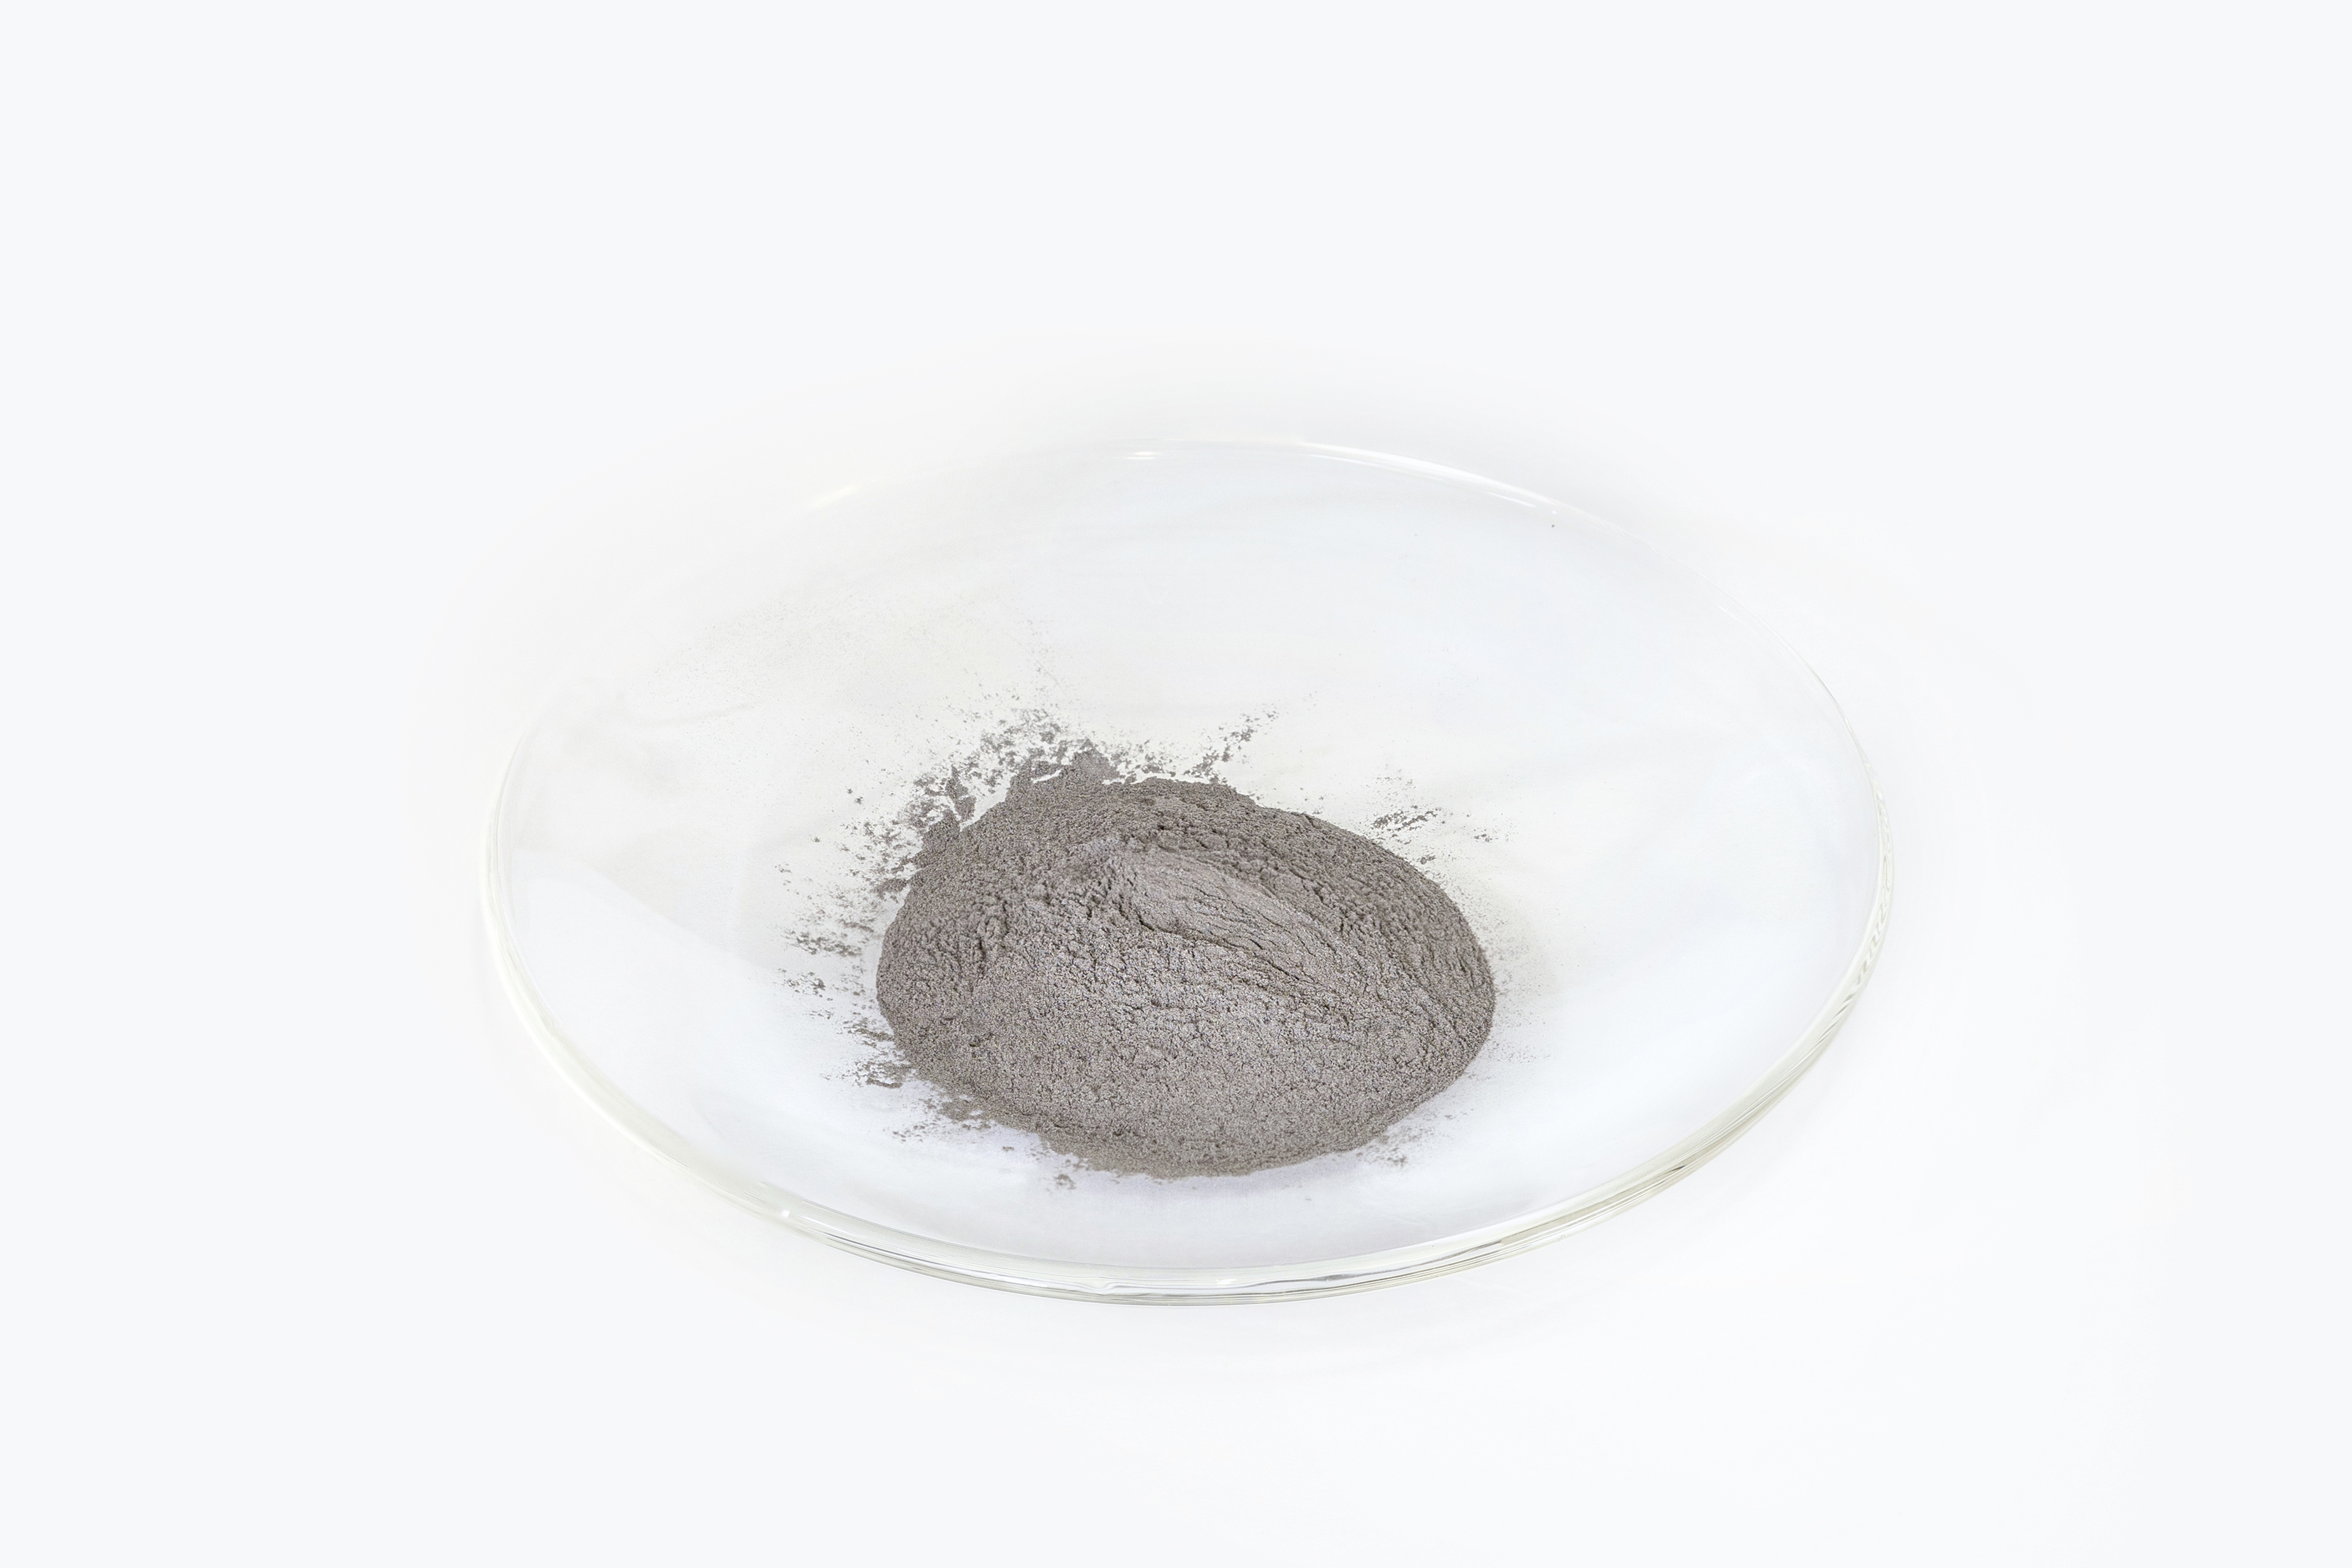
Metal powder.
© Fraunhofer IOF
By means of selective laser melting, metal powder can be used for additive manufacturing of complex components.


Fraunhofer IOF has been manufacturing lightweight metal optics of very high quality for years. Mirrors made of aluminum are processed to optical precision using diamond cutting tools, followed by shape and roughness correction steps. Before the finishing, the mirror substrates are processed by chipping technologies to reduce weight. In general the accessibility of the substrate geometry with tools is limited, which only allows rather simple designs. This also constrains the lightweight factor and can only be improved by changing technologies and processes. Additive manufacturing techniques offer great potential to achieve this as they allow nearly unlimited freedom of design. Selective Laser Melting can generate complex parts slice by slice out of metal powder. Therefore this technology has been added to the manufacturing chain for metal mirrors at Fraunhofer IOF. However, the approved aluminum alloys for metal mirrors are not yet qualified for the additive process, which represents one of the major tasks. Recent studies on a hypereutectic aluminum silicon alloy have shown good applicability of the material to the Selective Laser Melting process. This process generates very high cooling rates while fusing the powder particles, resulting in very fine microstructures. This leads to mechanical properties which are comparable to or better than those of conventional alloys of the same chemical composition. The porosity of the parts is below 0.05 %, measured by X-Ray tomography. Because of the complexity of the technique, the various process parameters are continually tailored to improve part performance.

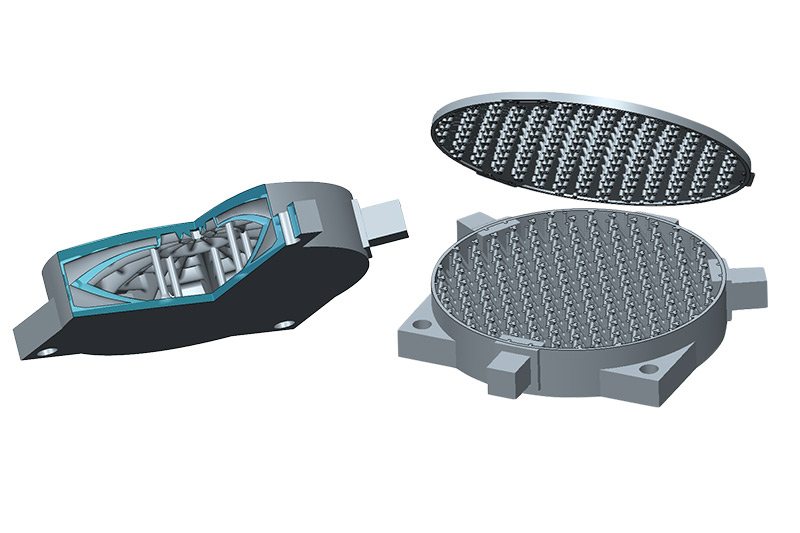
Further research addresses novel mirror designs with reduced weight. This involves regular cell structures, regular or irregular lattices, topology optimized designs, and simulation of metal foam as structural approaches (Fig. 2).

Recent results of mirror designs offer up to 64 % lightweight factor (conventional design is limited to approximately 40 %). The designs mentioned are entirely monolithic and the outer faces remain almost completely closed which ensures excellent specific stiffness. The latter is examined by finite element simulations which take processing constraints and external loads into account.

The feasibility has already been shown by manufacturing a demonstrator mirror, which was selective laser melted and post finished to optical precision (Fig. 1). The connection of these technologies offers a new quality for metal optics.


Acknowledgement

Parts of the presented results were funded by the German Aerospace Center (DLR) within the project ultraLEICHT under grant number 50EE1408.


Metal powder
© Fraunhofer IOF
Fig. 1: Metal powder
Design with column type structure for stabilization (left). Design cell-type inner structure (right).
© Fraunhofer IOF
Fig. 2: Design with column type structure for stabilization (left). Design cell-type inner structure (right).


Authors: Enrico Hilpert, Johannes Hartung, Nils Heidler, Stefan Risse

More scientific publications


In addition, our researchers publish scientific results in scientific journals. A selection list of scientific papers on the subject of additive manufacturing can be found below:

More information


Further details on atomic layer deposition and our range of services can be found on the following page:


Have we sparked your interest?


Please contact us.

We develop customized solutions for photonic problems from industry and science.

Further information


Precision Optical Components and Systems

Get an overview of all services offered by our scientific department “Precision Optical Components and Systems” at Fraunhofer IOF.

Overview


Systems for Astronomy and Aerospace

Get an overview of our developed systems for astronomy and aerospace at Fraunhofer IOF.

Overview